| View previous topic :: View next topic |
| Author |
Message |
vionoob
Junior Member
Joined: 27 Feb 2017
Posts: 6
|
 Posted: Thu Mar 02, 2017 11:15 am Post subject: Need advise on violin repair Posted: Thu Mar 02, 2017 11:15 am Post subject: Need advise on violin repair |
 |
|
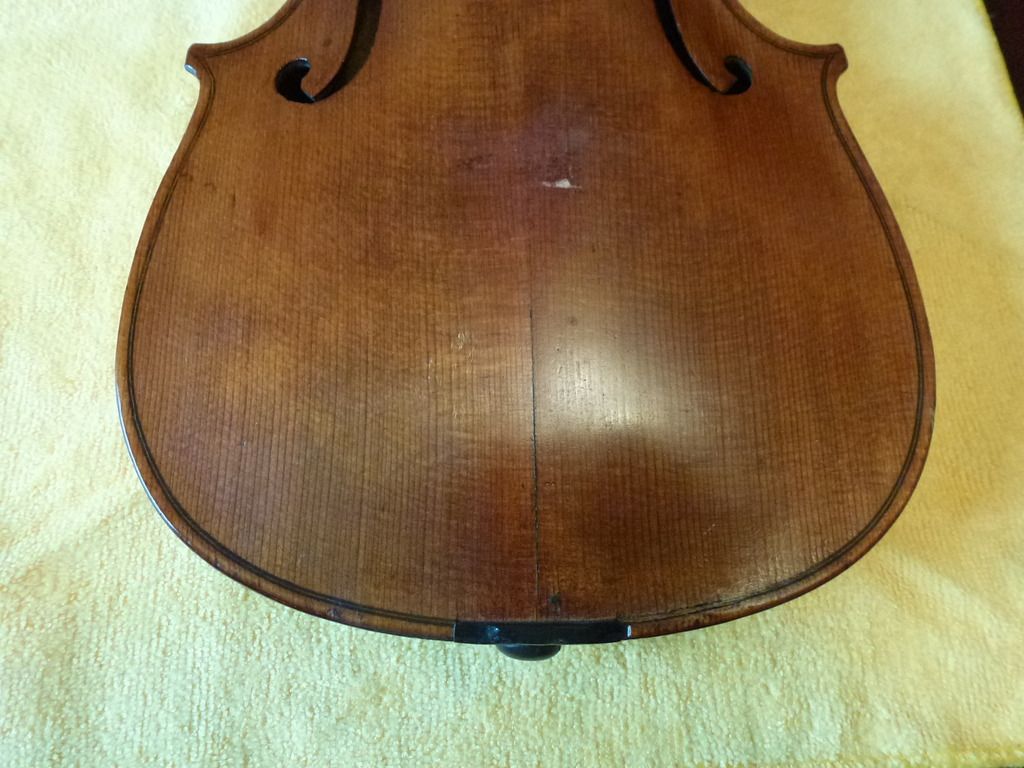
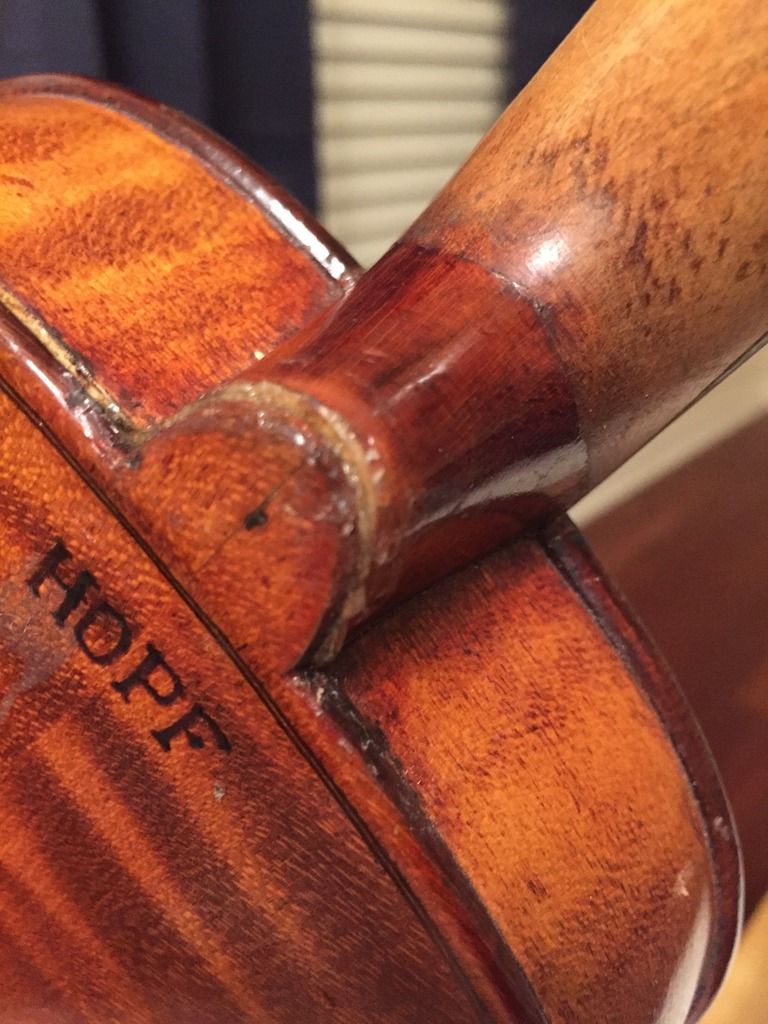
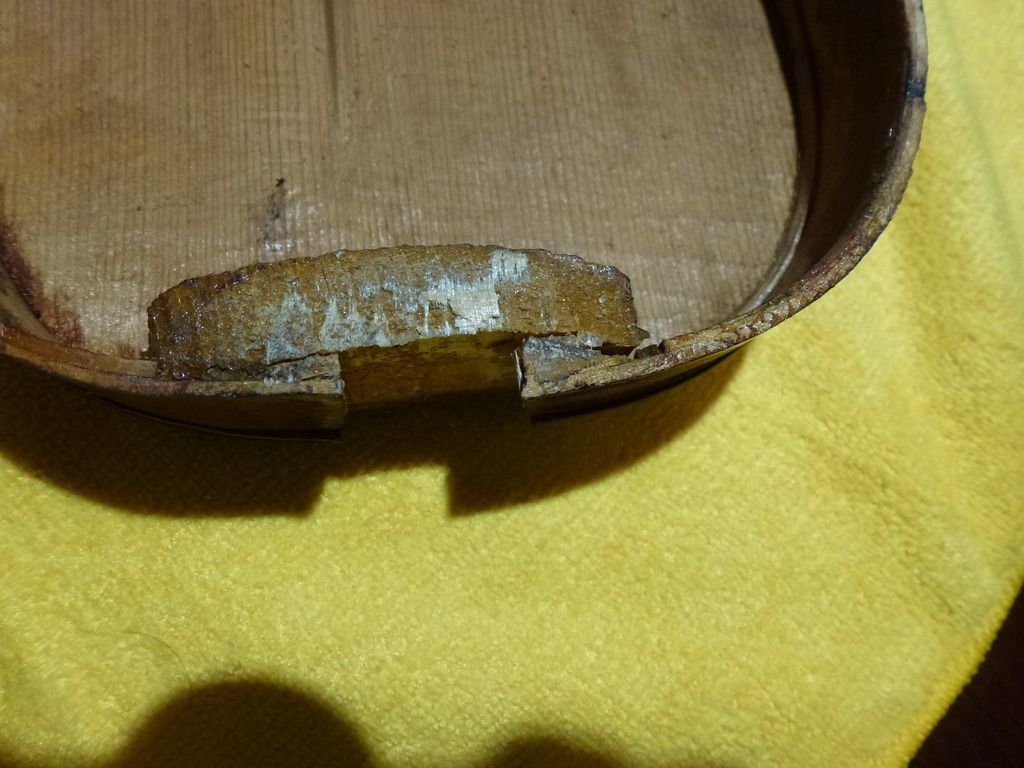
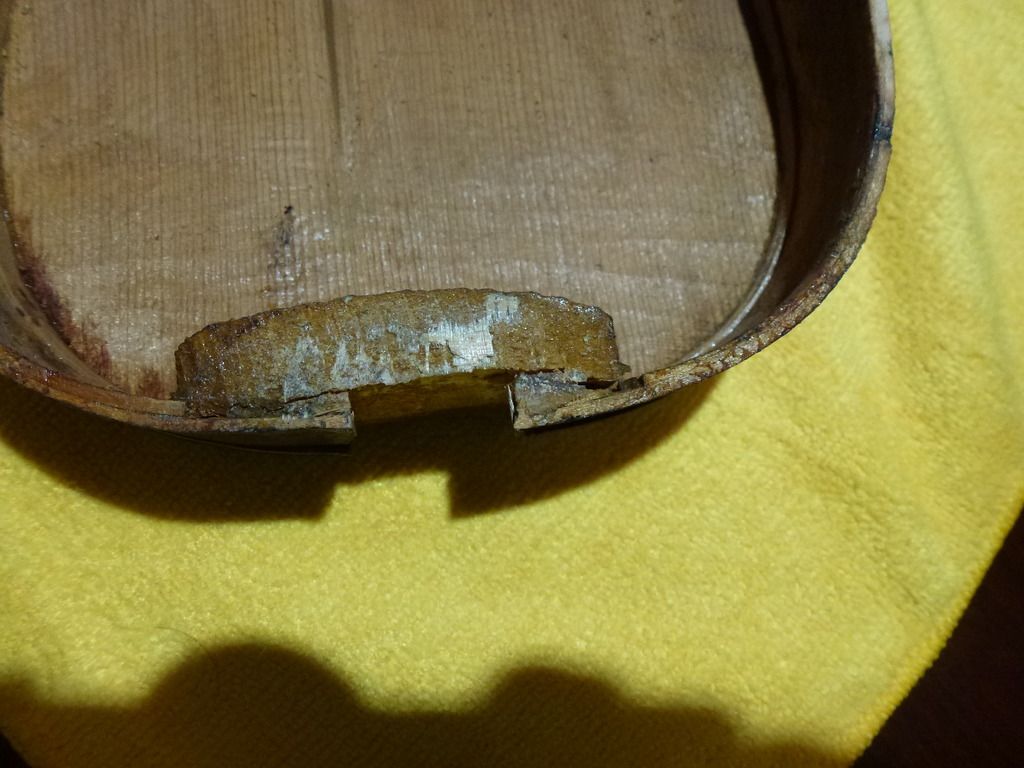
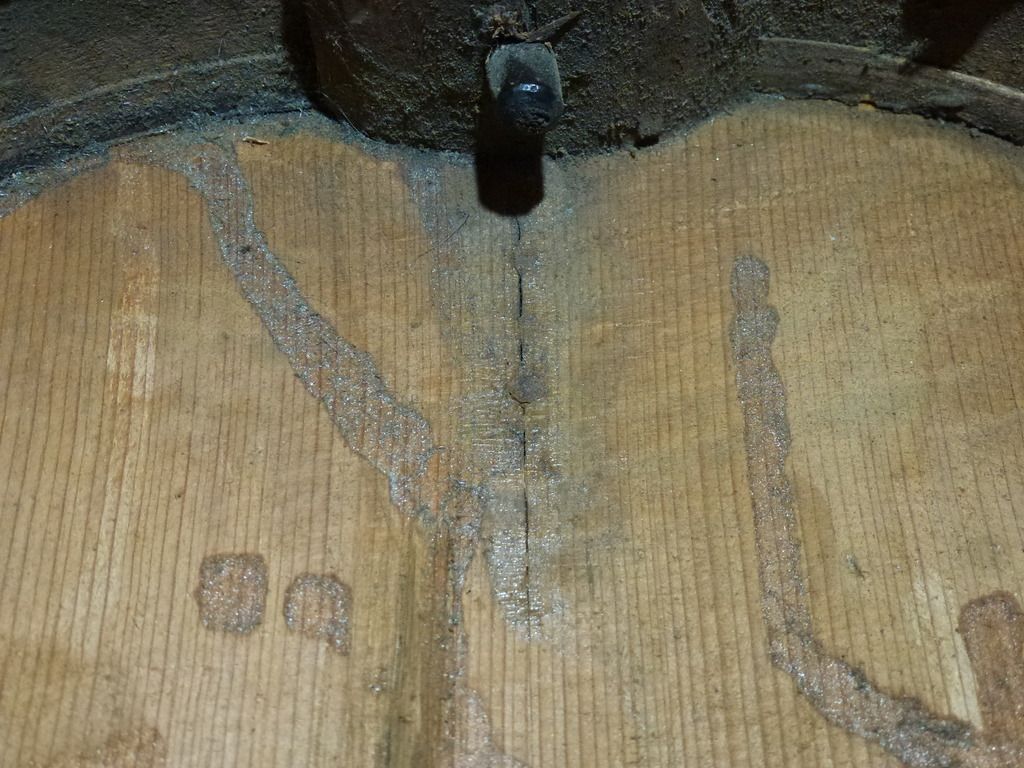
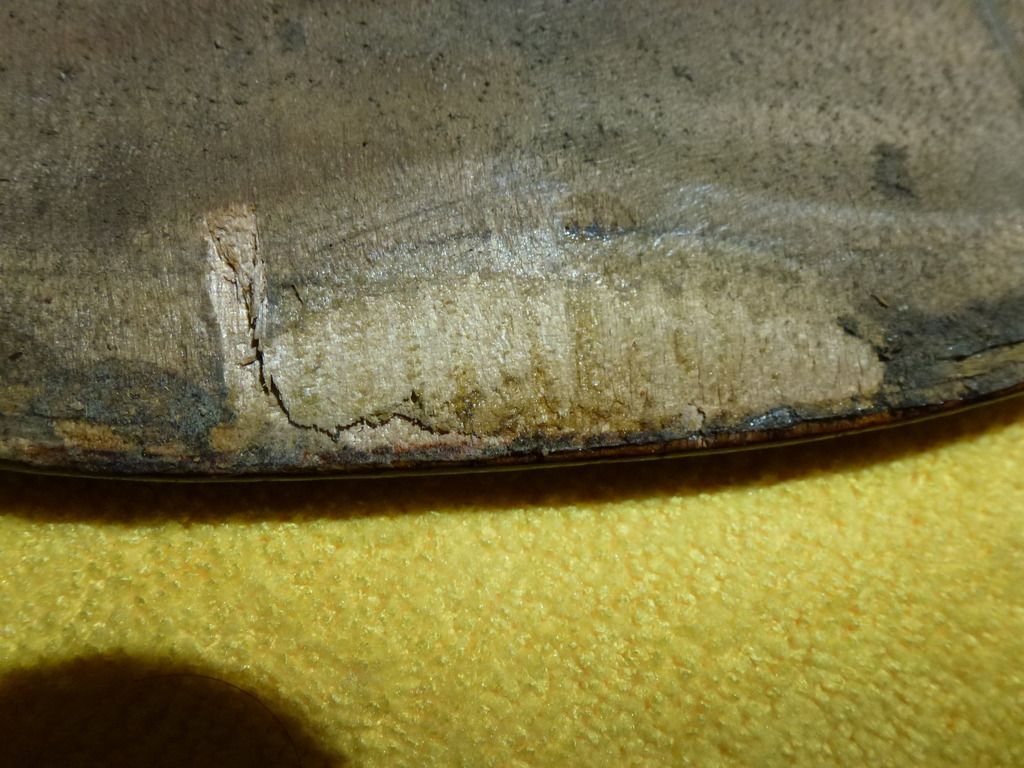
Hi All, New to violins and forum here. While trying to buy a aged violin cheap, ended up one which seems to have issues. At first glance it looked a ok but later realized neck alignment is bad, has a crack under tail piece and one rib doesn't look right. There seems to be a nail next to saddle.
Is it worth getting it fixed? Can I try DIY? Need advise.
Thank You

 |
|
| Back to top |
|
 |
FiddleDoug
Member
Joined: 08 Sep 2007
Posts: 227
Location: Hilton, NY
|
| Posted: Fri Mar 03, 2017 8:28 am Post subject: Violin repair |
|
|
The neck/button photo is a bit out of focus. Is that Gorilla glue, or some other kind of glue filling a space between the heel of the neck and the button? If it is, you're talking about a $500 neck reset to get the neck angle back, plus the other problems. I can't really tell about the rib from the picture, but it may be loose from the block. You can't really tell a lot from pictures, so you really need to take it to a luthier for evaluation. I'm guessing about $900, including set up. As far as DIY goes- If you don't have the skills, knowledge, or tools to do it, it might be a problem. A neck reset is a fairly complicated procedure.
_________________
Doug Wall
www.wallindependent.com |
|
| Back to top |
|
|
Chet Bishop
Super Member

Joined: 23 Mar 2007
Posts: 678
Location: Forest Grove, Oregon
|
|
| Back to top |
|
|
vionoob
Junior Member
Joined: 27 Feb 2017
Posts: 6
|
| Posted: Sat Mar 04, 2017 10:24 am Post subject: |
|
|
Doug, Chet Thanks for your kind advise.
Yesterday I took it to local luthier. At first glance he said not worth the cost. I will try one more place.
I guess at this point wall hanging and DIY project are two viable options. |
|
| Back to top |
|
|
vionoob
Junior Member
Joined: 27 Feb 2017
Posts: 6
|
| Posted: Sun Mar 05, 2017 7:17 pm Post subject: Update |
|
|
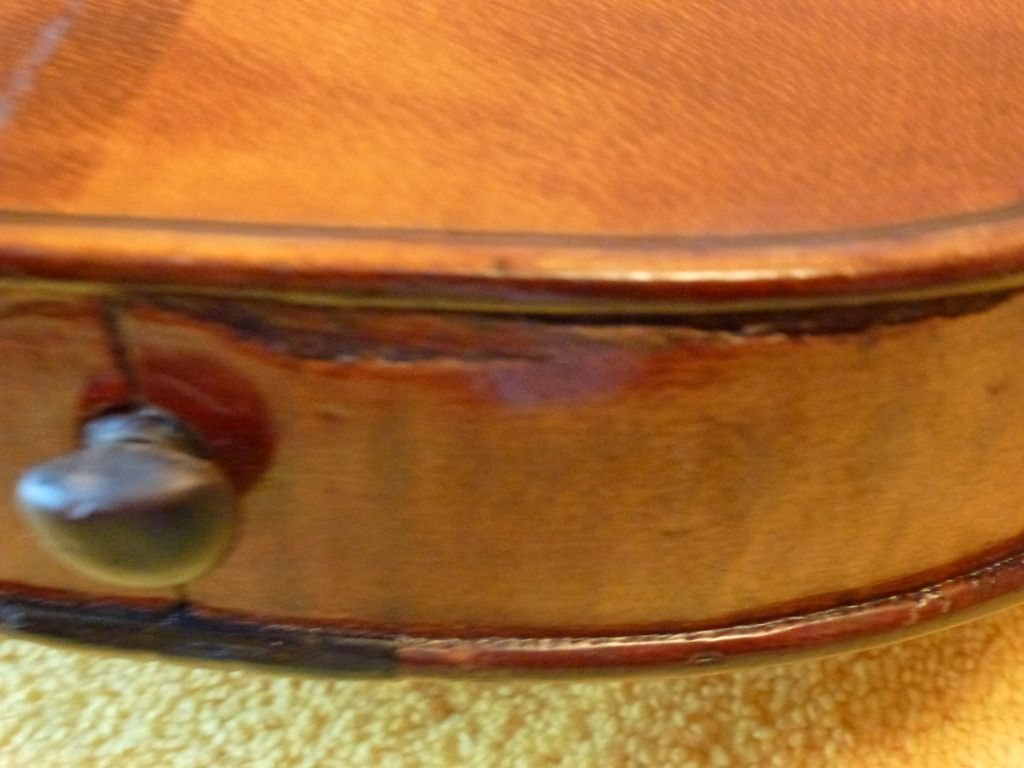
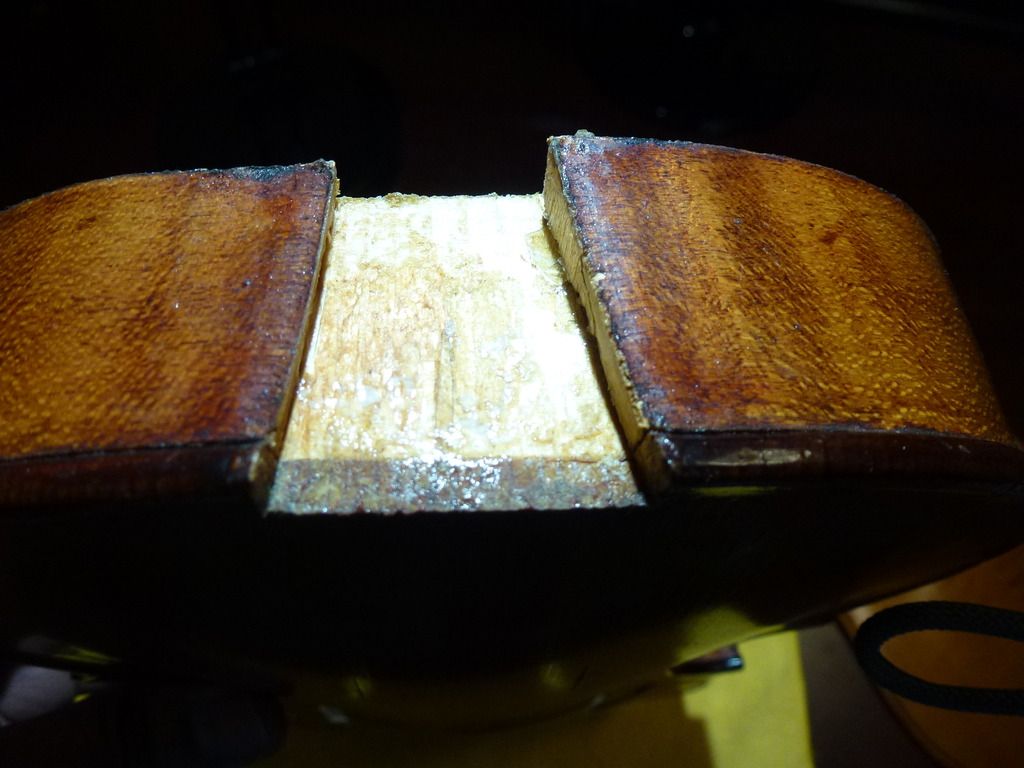
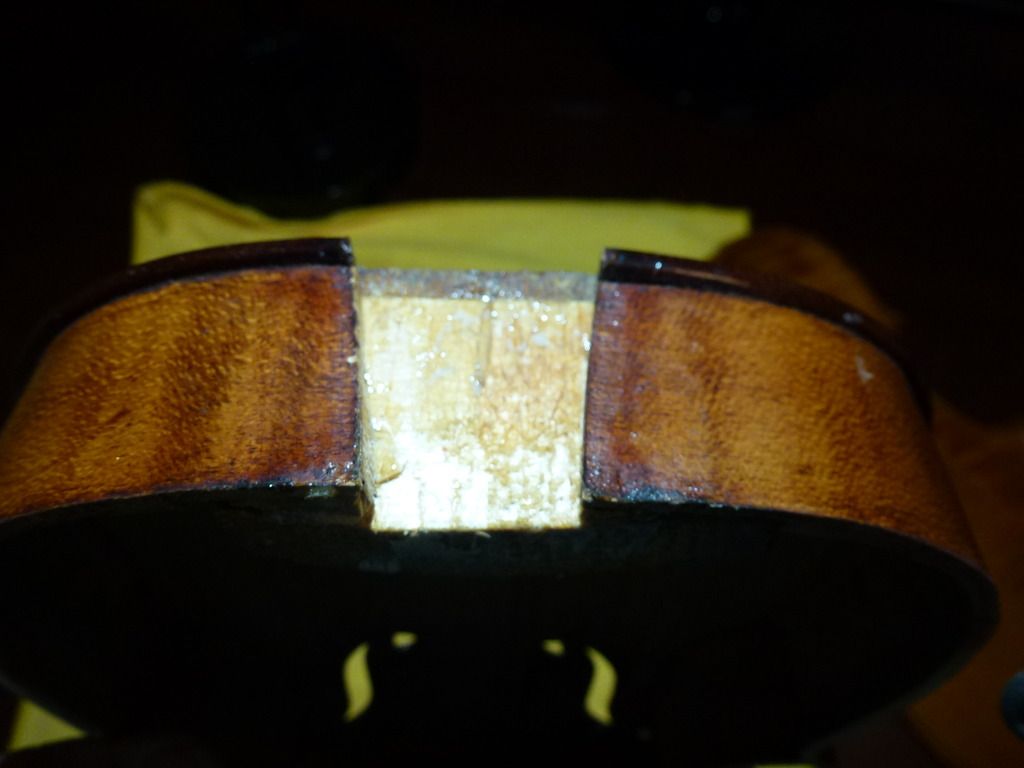
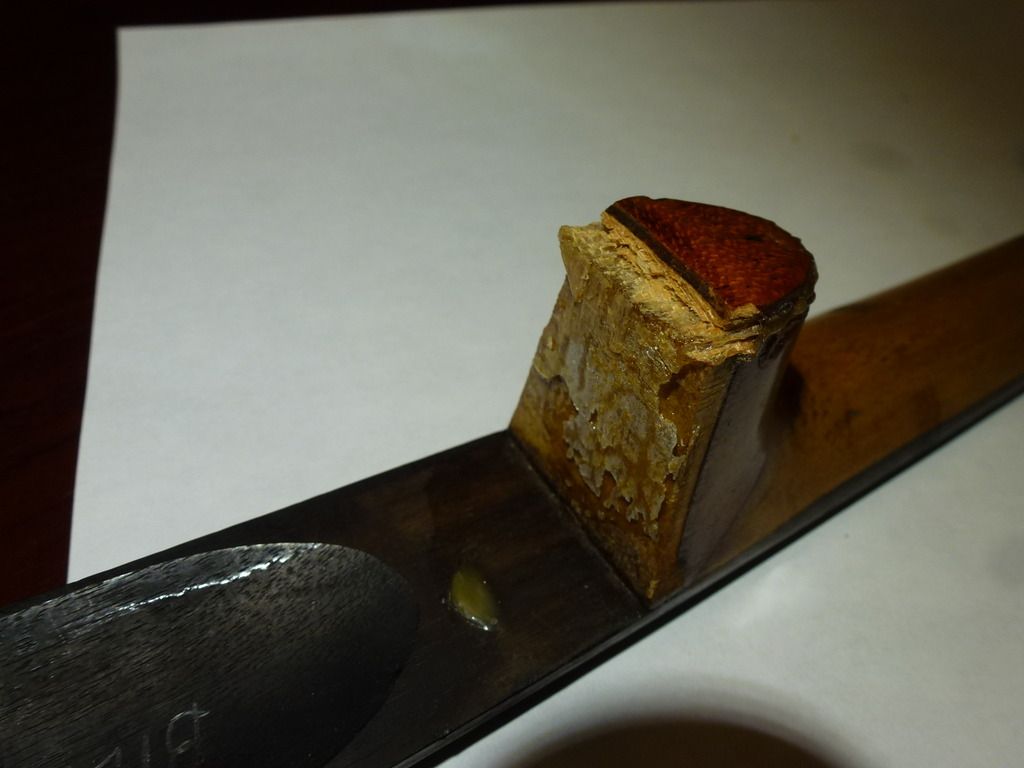
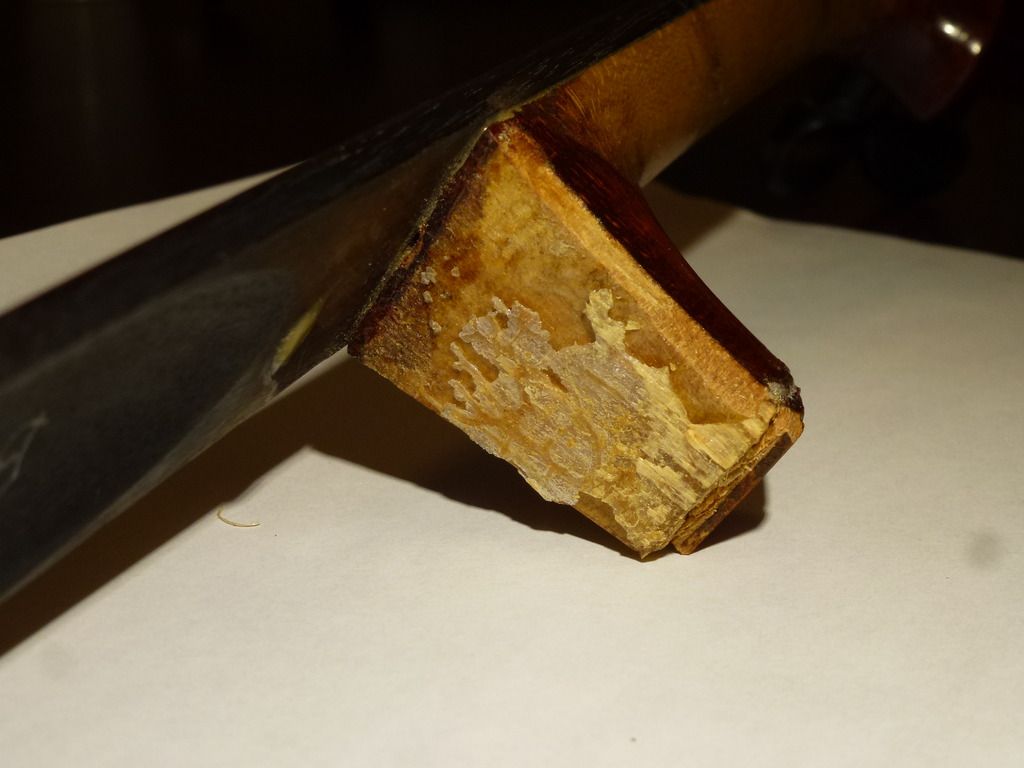
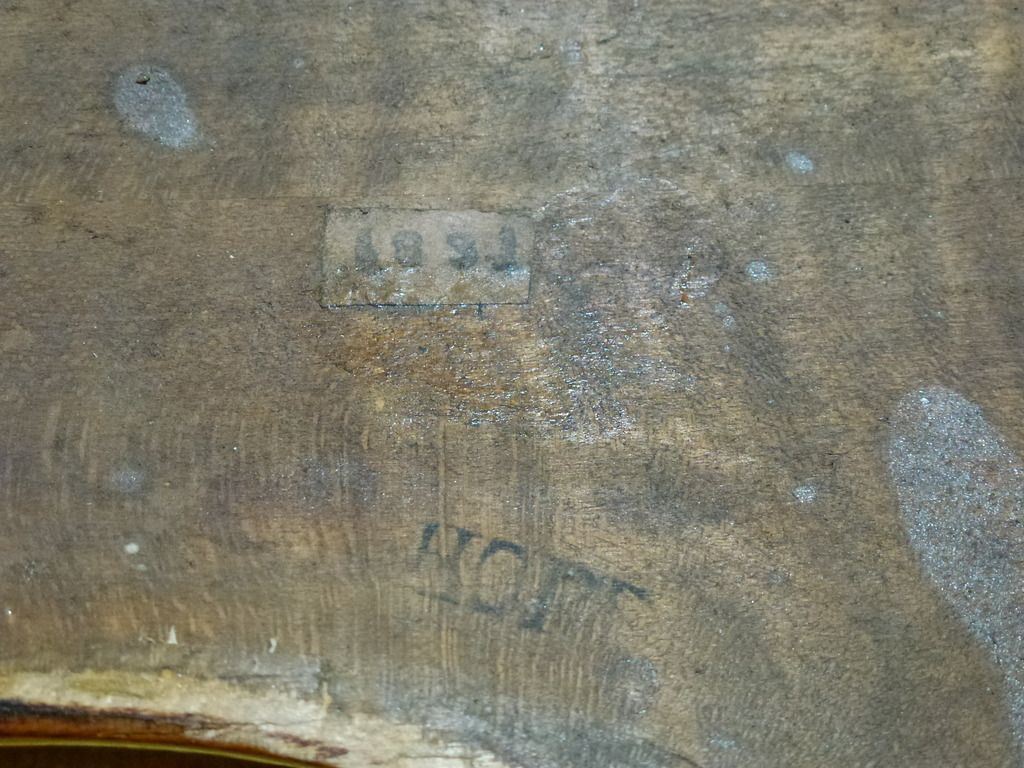
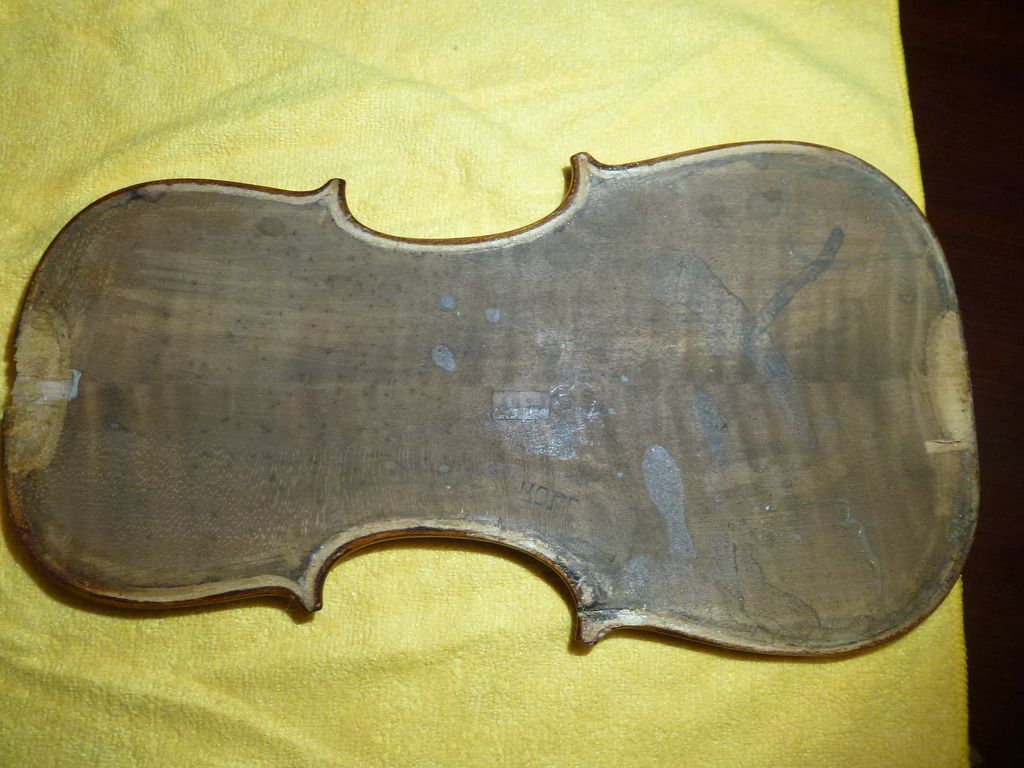
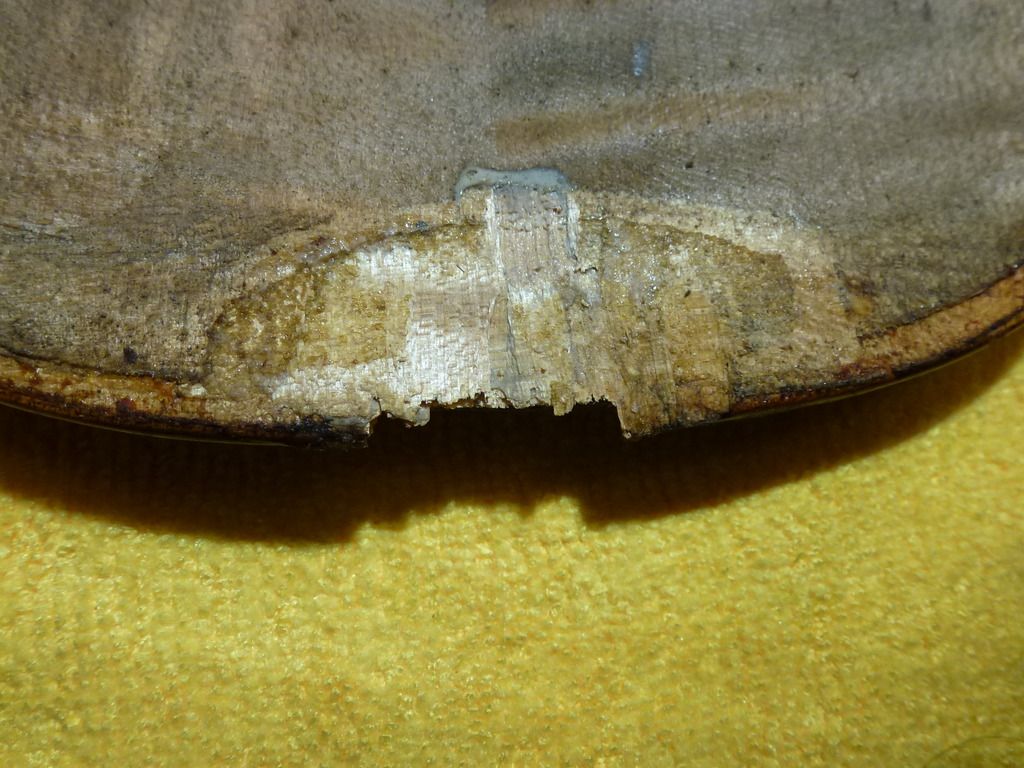
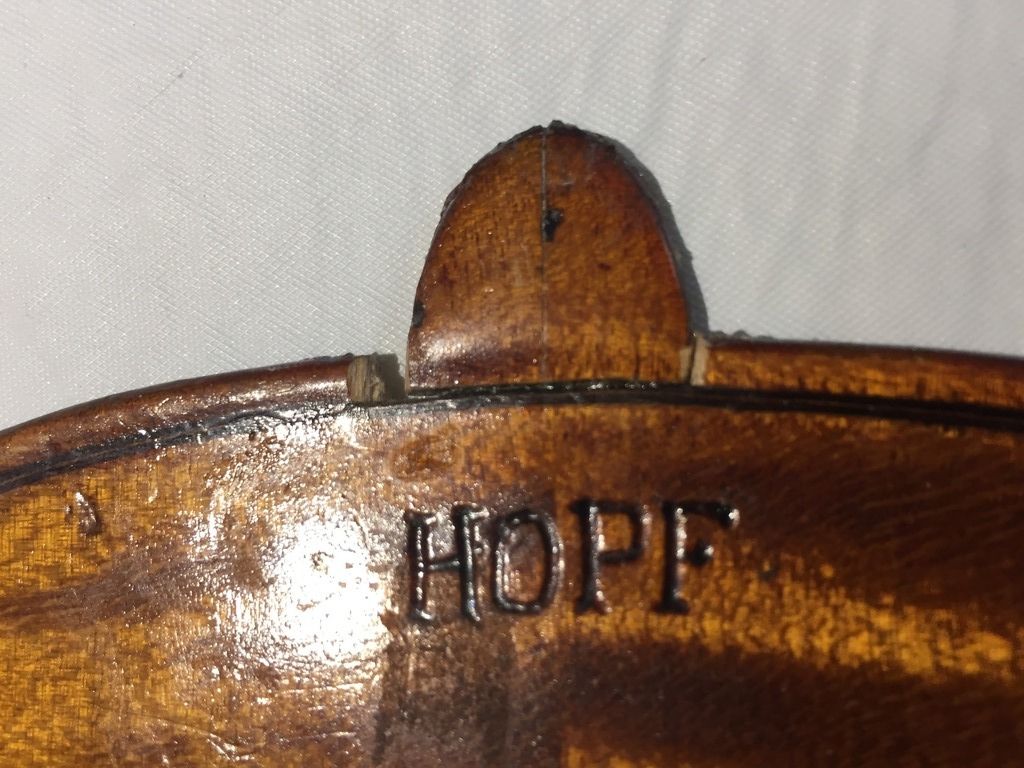
Decided to try on my own. Removed the neck. It came out relatively easily. Button different story, snapped cleanly. Opened the top. Here are some pictures.
 |
|
| Back to top |
|
|
Chet Bishop
Super Member
Joined: 23 Mar 2007
Posts: 678
Location: Forest Grove, Oregon
|
| Posted: Sun Mar 05, 2017 8:46 pm Post subject: |
|
|
Actually, you removed the back, not the top, which in this case, is good, because you are going to have to do a button graft, before just about anything else. Good learning opportunity!
The rest is a piece of cake by comparison, but you have a delightful adventure ahead of you. Take it a step at a time, enjoy the journey, and know that when you are done, you will have a nice fiddle, and know a great deal more about violin repair.
If you want to, you can remove the old integral bassbar, ...or not. Your call.
Looks like fun, to me. Good luck with it all. Feel free to ask for futher advice.
_________________
Chet Bishop
https://bluefiddles.com
https://fivestringfiddles.com |
|
| Back to top |
|
|
vionoob
Junior Member
Joined: 27 Feb 2017
Posts: 6
|
| Posted: Mon Mar 06, 2017 8:42 am Post subject: |
|
|
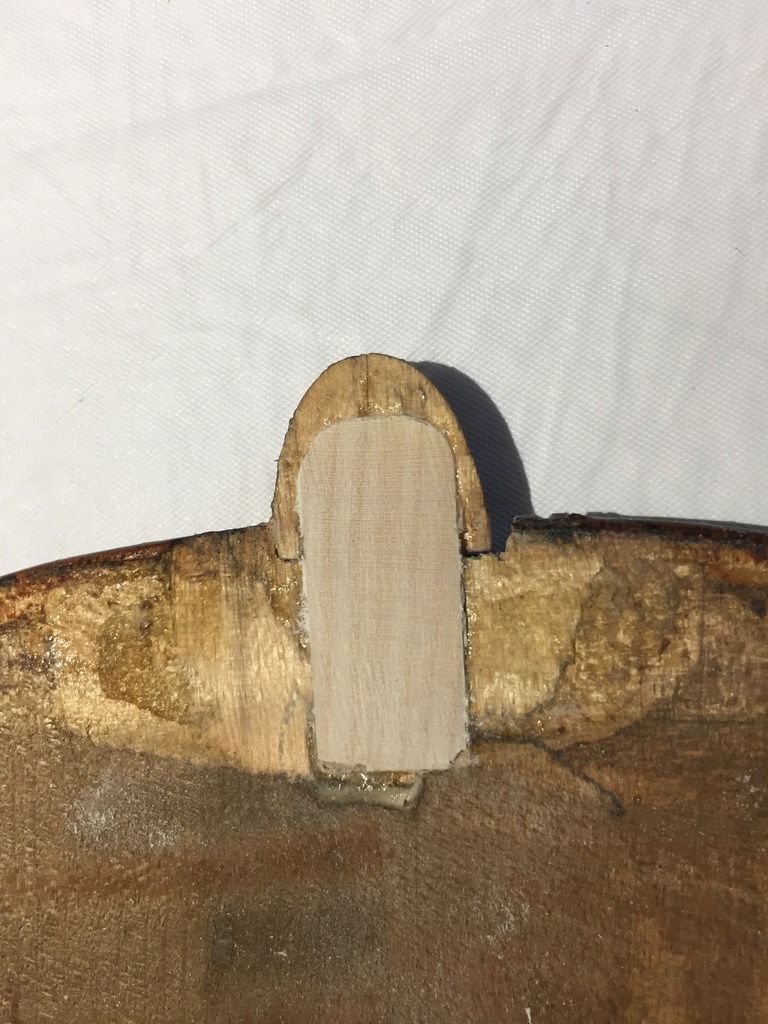
Thanks Chet,
I tried to open the top, but saddle didn't come off, so opened the back. I was expecting to see corner blocks, didn't find any.
Button grafting is going to be tricky to say the least, first I have find some tonewood. |
|
| Back to top |
|
|
Chet Bishop
Super Member
Joined: 23 Mar 2007
Posts: 678
Location: Forest Grove, Oregon
|
| Posted: Mon Mar 06, 2017 11:15 am Post subject: |
|
|
For the graft, just get some dry maple-- kiln-dried is OK. Then:
1. Carefully separate the button from the heel of the neck.
2. Glue the button back onto the back-plate, exactly the way it was before you broke it.
3. After the glue is fully dry, carve out a shallow, curved trench, perhaps 2 mm deep, taking up all the area of the button except maybe 3 mm around the edge, and extending all the way down across where you can see the block was glued to the back. It should be rather "spoon-shaped", and smoothly curved.
4. Chalk-fit a section of maple to fit that mortise perfectly.
5. Glue the plug into the mortise using fresh, strong, hot hide glue.
6. Allow the glue to dry completely.
7. Plane the plug flush with the back plate
At that point you should be ready to re-install the back plate. But while the back is off, investigate and repair anything needed on the other parts of the violin.
(Make yourself a set of maybe 30 spool-clamps while you have the fiddle open. Decide whether to replace that integral bass-bar. Examine that front center-seam, and see whether it needs attention. etc.)
This will be a good learning experience at worst, and you may end up with a very nice fiddle. 
Press on!
_________________
Chet Bishop
https://bluefiddles.com
https://fivestringfiddles.com |
|
| Back to top |
|
|
FiddleDoug
Member
Joined: 08 Sep 2007
Posts: 227
Location: Hilton, NY
|
| Posted: Fri Mar 24, 2017 7:20 am Post subject: After the button graft |
|
|
After you do the button graft, and put the back back on, You have to make sure that the neck angles, and overstand, are correct, before you glue the neck back in. This could, worst case, involve filling the neck mortise, and re-cutting it.
_________________
Doug Wall
www.wallindependent.com |
|
| Back to top |
|
|
kubasa
Member
Joined: 13 Sep 2007
Posts: 212
|
| Posted: Sat Mar 25, 2017 12:21 pm Post subject: |
|
|
The kind folks over at Triangle Strings have put together some nice tutorials for different repairs. I don't know that they are intended to be complete guides but there is a lot of good information nonetheless with lots of photos (which always helps me). Once you get the button graft figured out, they have 3 articles on resetting a neck that might be good to look at in addition to the great information posted here.
https://trianglestrings.com/techniques/
James |
|
| Back to top |
|
|
vionoob
Junior Member
Joined: 27 Feb 2017
Posts: 6
|
| Posted: Tue Apr 04, 2017 5:26 pm Post subject: Update |
|
|
Hi Guys
Thank you all for your advise. Made little progress with button grafting. There are gaps on each side of the button. Also I see a hairline gap between back and button. I couldn't glue button first because I have no clamp to hold it in place, so I glued all together, button might have slipped a bit. I may have to glue again.
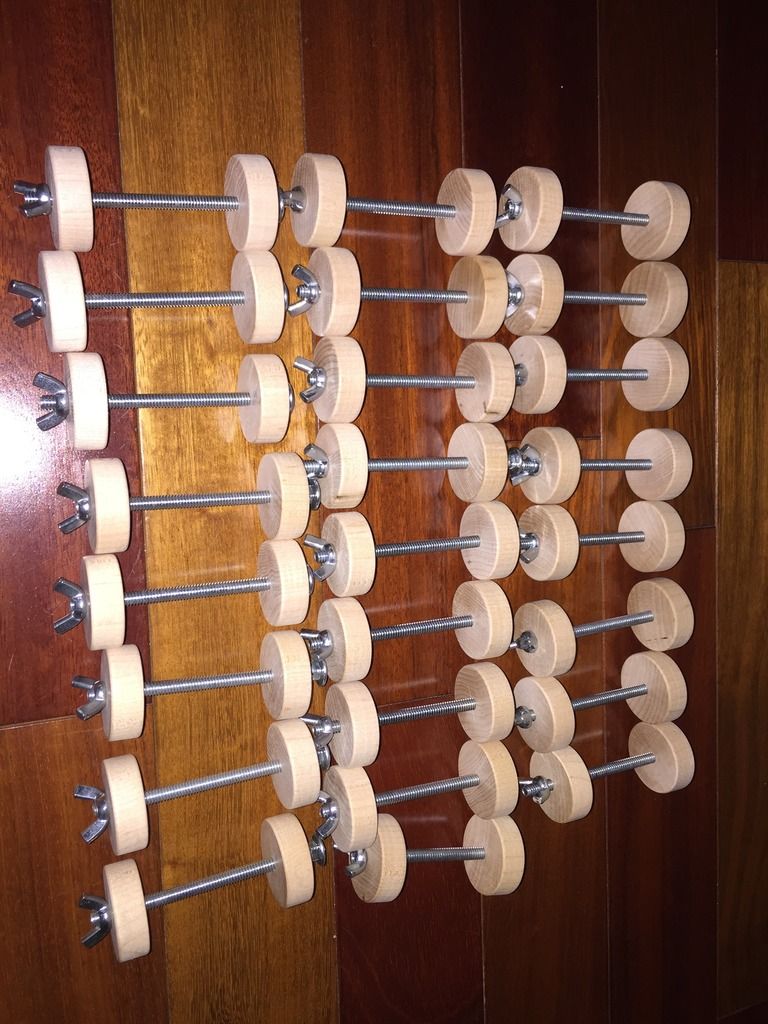
Also made 25 spool clamps. Few more in the works.
 |
|
| Back to top |
|
|
Chet Bishop
Super Member
Joined: 23 Mar 2007
Posts: 678
Location: Forest Grove, Oregon
|
| Posted: Wed Apr 05, 2017 12:02 pm Post subject: spool clamps. |
|
|
You might want to pad those clamp faces with cork or leather. Your call...but, the way they are, they will definitely leave marks on the fiddle. (Experience speaking, here...) 
_________________
Chet Bishop
https://bluefiddles.com
https://fivestringfiddles.com |
|
| Back to top |
|
|
vionoob
Junior Member
Joined: 27 Feb 2017
Posts: 6
|
| Posted: Fri Apr 07, 2017 11:12 am Post subject: Re: spool clamps. |
|
|
| Chet Bishop wrote: | | You might want to pad those clamp faces with cork or leather. Your call...but, the way they are, they will definitely leave marks on the fiddle. (Experience speaking, here...) |
I have a cork sheet, have to figure out a easy way to cut 60 circles. |
|
| Back to top |
|
|
Chet Bishop
Super Member
Joined: 23 Mar 2007
Posts: 678
Location: Forest Grove, Oregon
|
| Posted: Fri Apr 07, 2017 2:16 pm Post subject: |
|
|
If you have section of steel conduit (or pipe) the right diameter, I s'pose you could sharpen the edge all the way around one end, and use it as a punch.
Just a thought...
_________________
Chet Bishop
https://bluefiddles.com
https://fivestringfiddles.com |
|
| Back to top |
|
|
L P Reedy
Super Member
Joined: 02 Apr 2009
Posts: 276
Location: Brevard, NC
|
| Posted: Fri Apr 07, 2017 5:57 pm Post subject: |
|
|
| Cut out squares, glue to discs (bolt hole can be made later) and trim with scissors. That's how I've always done it and alignment is simple. |
|
| Back to top |
|
|
|

