| View previous topic :: View next topic |
| Author |
Message |
catbrain
Junior Member
Joined: 22 Sep 2023
Posts: 23
Location: Greeneville TN.
|
 Posted: Mon Oct 16, 2023 2:22 am Post subject: go thinner or not thinner ? Gun shy- Posted: Mon Oct 16, 2023 2:22 am Post subject: go thinner or not thinner ? Gun shy- |
 |
|
Hi all-- I have been away for several years because of moving 800 miles.
From central Fl. to east TN. (much nicer here BTW)
Just getting back to building. working on #3 top and bottom plates.
Violin @ came out pretty well- except it is a bit loud and i have to use violino strings just to bring it down to something passable- but its still on the loud side
and the G and a strings are very powerful. all most viola-like power. The whole instrument shakes in your hand while playing g and a - especially G.
So I surmise i got the top a bit too thin. I didnt keep a notebook on it but Ithink the top was about 300 for mode 5 (from memory)
So I don't want to repeat that error again.
The top in question:
about 91 grams---
upper bouts 3.3-3.4mm
lower bouts 3.35-3.4mm
center about 3.4mm
deepest part of the channel is about 4mm
bouts rise to about 5mm about 3/8 inch from edge of cut area. (where the sides glue in)
My last Chaladni mode 5 said g#4-30
tapping and letting my tuner read it -- says G#4+20
i have to work the edgework down a bit more on the channel---to refine the
cupped out area and the outboard edges. and I have not cut F holes yet.
Should I go down a bit thinner or should I stay where I am ?
I am a bit afraid of again going too thin. I am at the roughing out stage on the back plate-- so it will be a while on that yet.
Thanks for your opinions---- as i'm as a blind man trying to roller blade
on an ice skating rink.
Tim B. |
|
| Back to top |
|
 |
Michael Darnton
Moderator
Joined: 23 Mar 2007
Posts: 1281
Location: Chicago
|
| Posted: Tue Oct 17, 2023 2:08 pm Post subject: |
|
|
I don't think I've ever heard a player complain that a violin was too loud!
Let's not talk about this one, since you don't know how it sounds yet. How thick was the top in all of those areas on the one you don't like?
It sounds to me like you might have made the top too thin directly inside of the upper block. Did you chop the grads down quickly right off the block, or did you feather the thickness out gradually. I suspect the former. If so, don't do that. :-) You should keep a lot of support for the upper block from the thickness of the top in that area rather than thinning the top as far out towards the edges as possible.
_________________
new blog at my site! http://darntonviolins.com/blog
my work sites: http://darntonviolins.com and http://darntonhersh.com |
|
| Back to top |
|
|
catbrain
Junior Member
Joined: 22 Sep 2023
Posts: 23
Location: Greeneville TN.
|
| Posted: Tue Oct 17, 2023 10:20 pm Post subject: |
|
|
I feathered it out nice and gradually. I think I had the thicknesses at about what Strobel recommended. Later after I started playing it I was a bit suspicious that the thickness just inboard of the channel--- all the way around might have been too thin.
If you compare a top to a speaker cone--- they have a rigid cone and a narrow strip around the edge thats pleated so the rigid cone can move in and out.
I imagined the area in the first 3/4 to 1 inch inboard of the glue joint with the top-- might be acting like the bellows on a speaker. The thinner it get the more the belly can move as a whole.
for what its worth-- the instrument has gotten some better with age and playing. Its all most tolerable now and some what more willing under the bow.
but it is still louder than any other one I have played.
I may try to get my old violin teacher to try it out and get an unbiased opinion. she has never seen it or played it .
Do you think I am a bit thick on the current top for its weight and tone ? should I take a chance on it as is--- and cut the F holes and not thin any more ? ( 91 g weight--- and G# + or - for tap tone. both bouts about 3.4 mm and tapering thicker at about 1/2 ot 3/4 inch from the body joint.
Its kind of a cross roads I guess--- left road or right road .....  |
|
| Back to top |
|
|
catbrain
Junior Member
Joined: 22 Sep 2023
Posts: 23
Location: Greeneville TN.
|
| Posted: Tue Oct 17, 2023 10:24 pm Post subject: ps |
|
|
when you say "upper block" do you mean the neck block
and when you say "inside" --- do you mean where the glue joint is that
joins with the neck block to the top ? Do you mean the top is too thin THERE ? |
|
| Back to top |
|
|
catbrain
Junior Member
Joined: 22 Sep 2023
Posts: 23
Location: Greeneville TN.
|
|
| Back to top |
|
|
Michael Darnton
Moderator
Joined: 23 Mar 2007
Posts: 1281
Location: Chicago
|
|
| Back to top |
|
|
catbrain
Junior Member
Joined: 22 Sep 2023
Posts: 23
Location: Greeneville TN.
|
| Posted: Thu Oct 19, 2023 1:36 am Post subject: is this right ? |
|
|
if I understand what you mean by "edge" ----- like I should lay the body down against the top--- draw a line with my pencil lead against the linings--- so the pencil like marks the inner edge of the linings on the back side of the top plate-- and as I cut the inside curvature of the top --- that curvature should (try) to stop exactly at my scribed line---- so there is not any "flat shelf" at the outer edges of the plate as you approach the linings.
Is that what You mean ?
I cut the inside of the plate down a bit more- and now I am at about 3 mm everywhere-- with maybe just a little less in the bouts but no much.
I was considering doing sone light scraping of the outside for cosmetics ---
(after I refine my edgework more) so that may remove .1 or .2 mm more.
I will lay the body on and see if my hollowing stops at the linings or inboard.
Before I have ledt just a little border --- say 1/8 inch...... |
|
| Back to top |
|
|
catbrain
Junior Member
Joined: 22 Sep 2023
Posts: 23
Location: Greeneville TN.
|
| Posted: Thu Oct 19, 2023 3:44 am Post subject: |
|
|
ok--- I can see what you mean clearly on the photo of the back with the calipers on it. You scoop right to the edge of the linings.
So that means I have to do some more cutting out further in the areas between the linings.
That should have a pretty drastic effect around the sound holes as opposed to the way I have it now.
Thanks for that---- now I have some more work to do to make it correct and hopefully get the sound it deserves In not sure how I missed seeing that error---- maybe from taking 5 years off--- im haveing to re-learn some of it.
Cudos and much respect for your skill in cutting purfling groove with a power tool. I did that on my first one with a similar home made tool--- but I found it just too stressful. I ended up making a home made tool that uses twin mini razor knife blades with a shim in between. Then I made a matching chisel to follow behind and slice out the land in between . works well. |
|
| Back to top |
|
|
catbrain
Junior Member
Joined: 22 Sep 2023
Posts: 23
Location: Greeneville TN.
|
| Posted: Thu Oct 19, 2023 12:06 pm Post subject: pic |
|
|
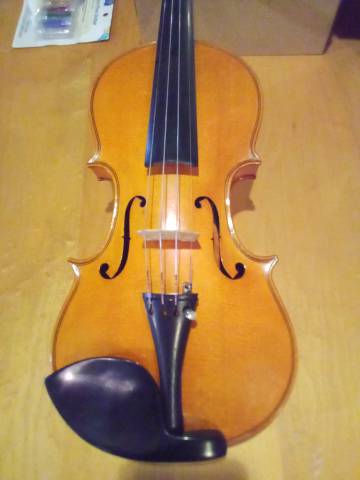

 [/img]https://imagizer.imageshack.com/v2/640x480q70/924/rvJjeM.jpg[img][/img] [/img]https://imagizer.imageshack.com/v2/640x480q70/924/rvJjeM.jpg[img][/img]
You can see the pencil line I drew inside the body about 5 years ago. I think I forgot why I drew it there. silly me-----

I am now shaving down the perimeter on the inside to bring the cut all the way to the edge of the linings. will show another pic when thats done----
I m at about 3mm all over so far...... |
|
| Back to top |
|
|
Michael Darnton
Moderator
Joined: 23 Mar 2007
Posts: 1281
Location: Chicago
|
| Posted: Sat Oct 21, 2023 5:01 pm Post subject: |
|
|
What you are trying to avoid is getting the grads too thin near the edge. It's fine if it's 3.5 mm or a bit more for an inch or so from the edge all the way around of the top and then thins gradually from there. What you want to be sure of is having good support in the area of the top around the neck. Similar to the heavy bracing above the sound hole in guitars.
_________________
new blog at my site! http://darntonviolins.com/blog
my work sites: http://darntonviolins.com and http://darntonhersh.com |
|
| Back to top |
|
|
catbrain
Junior Member
Joined: 22 Sep 2023
Posts: 23
Location: Greeneville TN.
|
| Posted: Sat Nov 04, 2023 3:27 am Post subject: |
|
|
| is that because the string tension is attempting to pivot the heel where it meet s the top ? So you allow the top wood to share the load ? |
|
| Back to top |
|
|
Michael Darnton
Moderator
Joined: 23 Mar 2007
Posts: 1281
Location: Chicago
|
| Posted: Sat Nov 04, 2023 9:00 am Post subject: |
|
|
That's it exactly. The neck needs to be supported in order to put all of the vibration into the bridge. A head that's flopping around because the neck isn't supported is not contributing anything, and the effect is a violin that sounds and feels like it's strung with rubber strings.
_________________
new blog at my site! http://darntonviolins.com/blog
my work sites: http://darntonviolins.com and http://darntonhersh.com |
|
| Back to top |
|
|
|

