| View previous topic :: View next topic |
| Author |
Message |
MartinPTaylor
Junior Member
Joined: 11 May 2017
Posts: 2
|
 Posted: Mon May 15, 2017 10:06 am Post subject: My first build Posted: Mon May 15, 2017 10:06 am Post subject: My first build |
 |
|
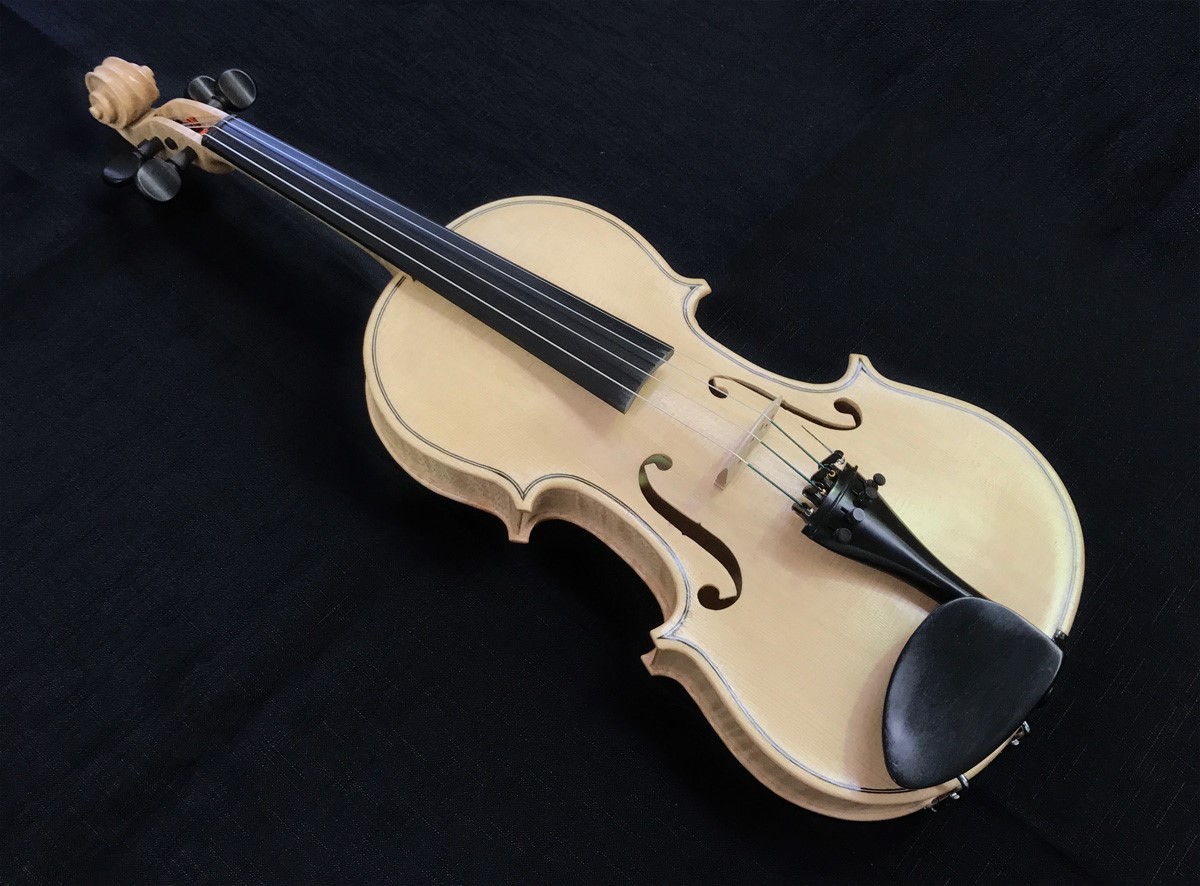
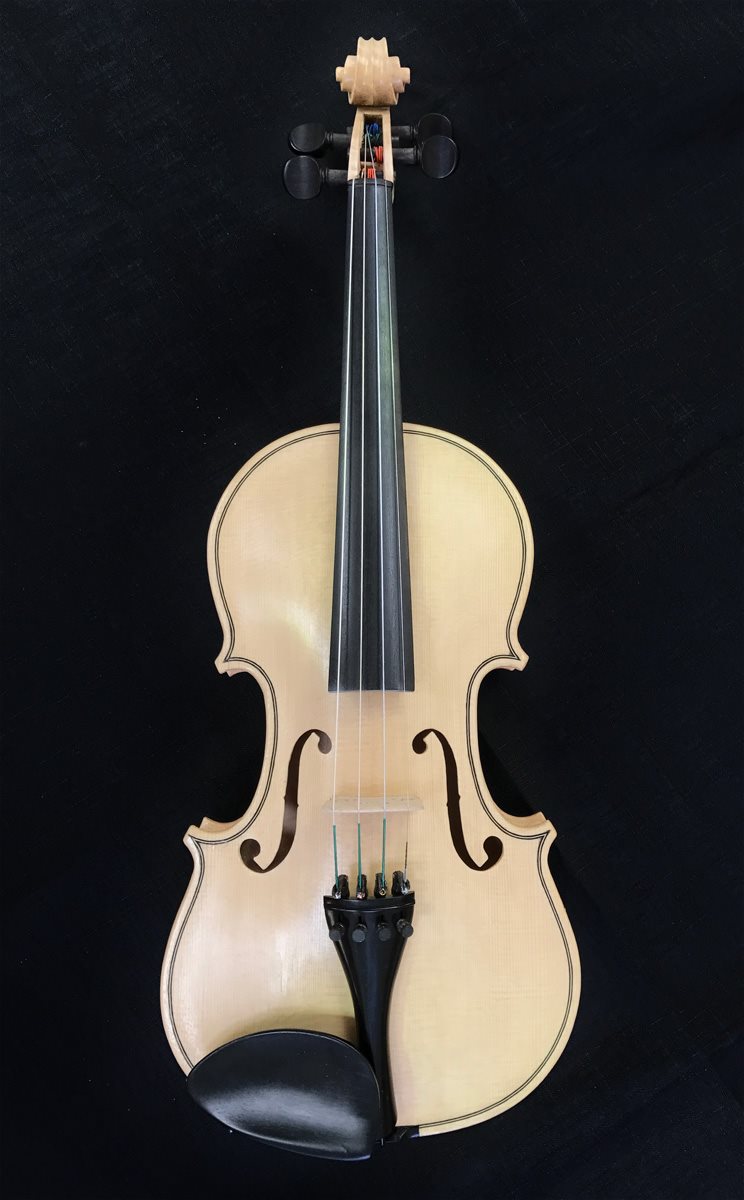
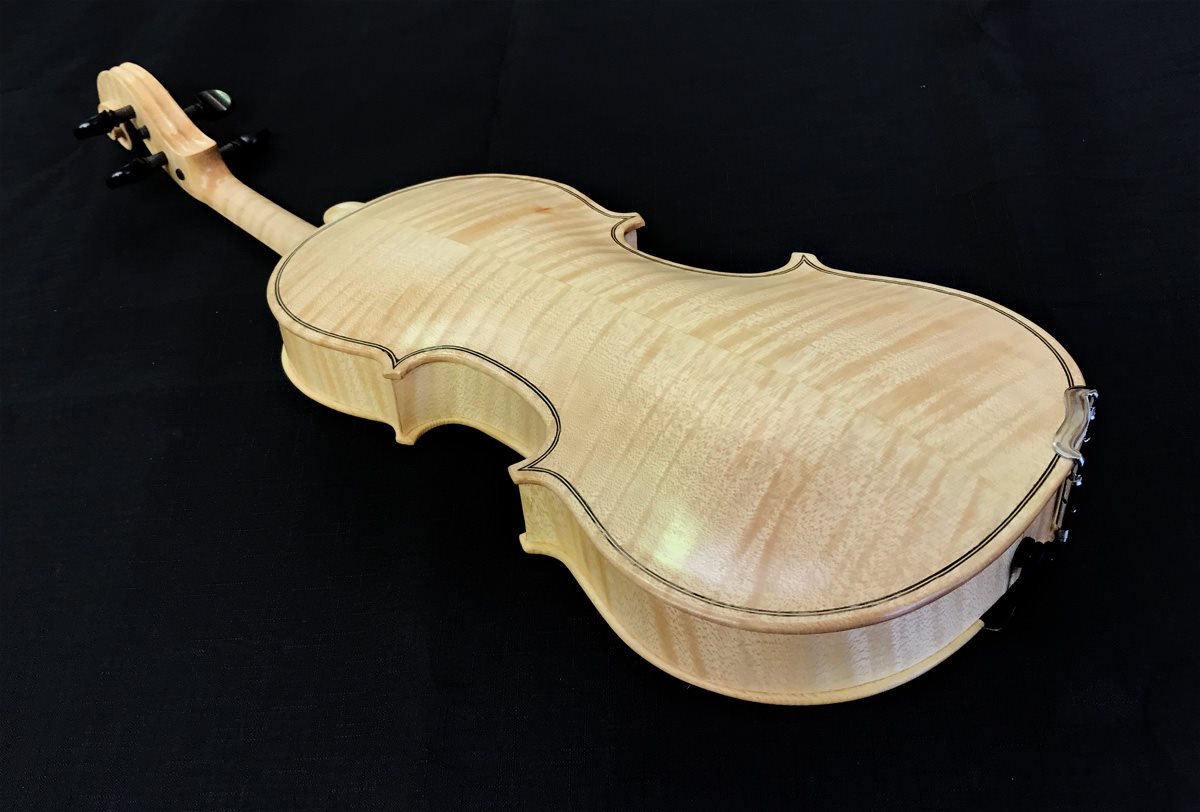
Hi, I have just completed my first violin and thought I'd share some pics. My background is in guitar making and I have enjoyed building something more "classical". I have purposely kept the "blonde" look which I know some don't like but I love the timber so, blonde it is!
 |
|
| Back to top |
|
 |
ollieken
Super Member
Joined: 26 Mar 2007
Posts: 281
Location: New Brunswick Canada
|
| Posted: Mon May 15, 2017 1:49 pm Post subject: Martin |
|
|
| Hello martin first one great job I like it |
|
| Back to top |
|
|
SioFong Tong
Junior Member
Joined: 20 May 2017
Posts: 10
|
| Posted: Wed May 24, 2017 11:14 am Post subject: |
|
|
Martin, good job!
I play guitar when i was a teenager. At that time I liked spruce guitar color than the orange brown cedar. And always have a question why violin can not in white as a spruce guitar.
Last week a friend visited my workshop. She said my unvarnish white violin is beautiful why you guys paint it in red? |
|
| Back to top |
|
|
Dave Chandler
Super Member
Joined: 31 Oct 2007
Posts: 691
Location: Mt Mitchell in North Carolina
|
| Posted: Wed May 24, 2017 4:07 pm Post subject: |
|
|
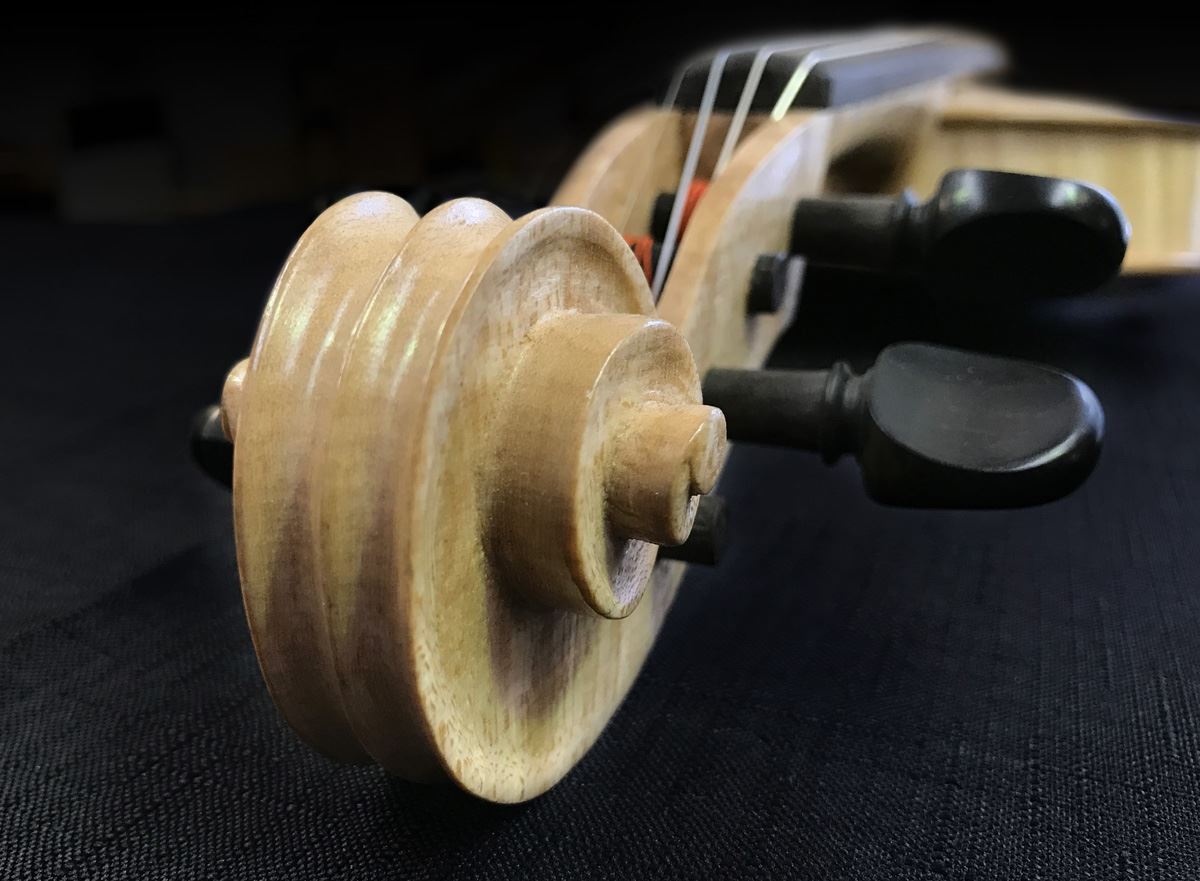
Nice carefull work from the pictures. The scroll would benefit from chamfer work on the scroll and pegbox, would make it look more finished. The purfling on the back's lower left edge seems obscured with something, or is that the lighting? Otherwise, looking very nice.
About the gaps around the purfling --- for future reference, you can fill this with a little plaster of paris, and disappears as you build up ground and varnish. Try first on a scrap piece left over from cutting out back/top, make a little gouge, fill it with plaster of paris, then go through your varnish procedure and see how it disappears.
_________________
Dave in the Blue Ridge
Southern Violin Association
"Success is the ability to go from one failure to the next with no loss of enthusiasm" Winston Churchill
"I took the road less travelled, and now I don't know where I am." Marco Polo |
|
| Back to top |
|
|
MartinPTaylor
Junior Member
Joined: 11 May 2017
Posts: 2
|
| Posted: Sat May 27, 2017 3:59 am Post subject: |
|
|
| Dave Chandler wrote: | Nice carefull work from the pictures. The scroll would benefit from chamfer work on the scroll and pegbox, would make it look more finished. The purfling on the back's lower left edge seems obscured with something, or is that the lighting? Otherwise, looking very nice.
About the gaps around the purfling --- for future reference, you can fill this with a little plaster of paris, and disappears as you build up ground and varnish. Try first on a scrap piece left over from cutting out back/top, make a little gouge, fill it with plaster of paris, then go through your varnish procedure and see how it disappears. |
Thanks Dave. Would be great to see an example f the chamfering you refer to. I am a visual learner I'm afraid. The purling being obscured on the back is the lighting I think. I had heard about the plaster of paris thing but didn't have the guts to try it! I will certainly keep this tip in mind for future reference. Hopefully, I will just get better at the cutting in next time. |
|
| Back to top |
|
|
Dave Chandler
Super Member
Joined: 31 Oct 2007
Posts: 691
Location: Mt Mitchell in North Carolina
|
| Posted: Sat May 27, 2017 4:29 pm Post subject: |
|
|
Practice makes better. Its like golf, you'll never be perfect, but you might score a sub par round someday.
_________________
Dave in the Blue Ridge
Southern Violin Association
"Success is the ability to go from one failure to the next with no loss of enthusiasm" Winston Churchill
"I took the road less travelled, and now I don't know where I am." Marco Polo |
|
| Back to top |
|
|
Dave Chandler
Super Member
Joined: 31 Oct 2007
Posts: 691
Location: Mt Mitchell in North Carolina
|
| Posted: Sat May 27, 2017 4:55 pm Post subject: |
|
|
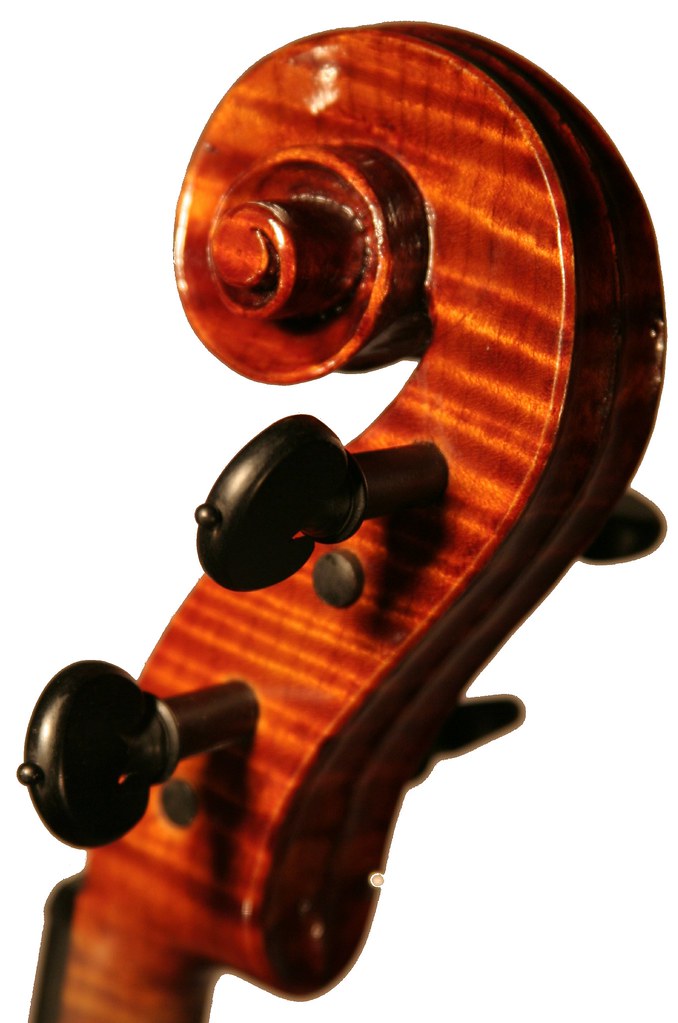
Below image is from Manfio's flikr account (hope he doesn't mind, because he's got a lot of his stuff posted here, including a nice visual tutorial on scroll making,)
You can see the chamfer going around the edge of the scroll, and along the back side of the pegbox. The slope on both sides of the chamfer, bot inside the scrolls interior and outer curve, ends at the edge of the chamfer. No flat areas in between.
If you have a chamfer edge, its not noticeable, so something to think about. AND since you don't have a color coat on the violin, you can still go back and rework parts you might have overlooked......or not. All inall, its a nice first attempt, better than my first for sure.
_________________
Dave in the Blue Ridge
Southern Violin Association
"Success is the ability to go from one failure to the next with no loss of enthusiasm" Winston Churchill
"I took the road less travelled, and now I don't know where I am." Marco Polo |
|
| Back to top |
|
|
|

