| View previous topic :: View next topic |
| Author |
Message |
bulerias1981
Member
Joined: 16 Jun 2007
Posts: 41
Location: Beacon, NY
|
 Posted: Fri Nov 09, 2007 9:58 pm Post subject: joining the back Posted: Fri Nov 09, 2007 9:58 pm Post subject: joining the back |
 |
|
Hi all. First time for me joining a back. Having difficulties. I've used a few different types of planes, even a shooting board. Cannot get both edges perfectly straight for joining. This is driving me a bit mad. Please give me your input. Thank you.
_________________
"I only write the notes as written, it is god that creates the music." J.S. Bach |
|
| Back to top |
|
 |
Dave Chandler
Super Member
Joined: 31 Oct 2007
Posts: 691
Location: Mt Mitchell in North Carolina
|
| Posted: Sat Nov 10, 2007 11:05 am Post subject: Joining the back |
|
|
Glad to hear I'm not the only one!! I'm really looking forward to hearing some input on this (I was embarrassed to ask it myself). I should probably just listen .... but here's my thoughts anyway.
I've used a plane, get as close as possible, then clamp a "shooting board" to the edge of my work table (making sure its a proper 90 degree) with a fresh piece of 220 sandpaper, and run each piece flat on the table against the sandpaper. You have to keep sweeping the sawdust out of the corner or it'll affect your final edge. You really have to concentrate on how you apply pressure, making sure its evenly applied, or you'll get ends that won't quite meet. I've gotten OK edges would like better.....
I'm thinking next time I'm going to do the same, but take it a step further. I plan to heat the wood, wet the edges with super hot water, let them swell a little, then clamp the hell out of it and let it thoroughly dry increasing pressure as it dries and shrinks. Seems to me that any small low spots should swell out and with good pressure remain pressed closely to the opposing side even after it dries. THEN reheat, glue and clamp. What do you think?
_________________
Dave in the Blue Ridge
Southern Violin Association
"Success is the ability to go from one failure to the next with no loss of enthusiasm" Winston Churchill
"I took the road less travelled, and now I don't know where I am." Marco Polo |
|
| Back to top |
|
|
bulerias1981
Member
Joined: 16 Jun 2007
Posts: 41
Location: Beacon, NY
|
| Posted: Sat Nov 10, 2007 11:35 am Post subject: |
|
|
sounds good I guess. I used the shooting board in a different way. I clamped down the wood and used the shooting board by hand. I think your way is better.
_________________
"I only write the notes as written, it is god that creates the music." J.S. Bach |
|
| Back to top |
|
|
Jeffrey Holmes
Member
Joined: 03 Apr 2007
Posts: 90
Location: Ann Arbor
|
| Posted: Sat Nov 10, 2007 11:55 am Post subject: |
|
|
The difficulties you're having may be due to how your planes are prepared and set up. It takes a good bit of "tuning" to get them working "right".
I've never seen a sandpaper joint I thought was worth the time to accomplish... Personally, I use a block plane to get things in range, and a jointing plane to finish things off (I have both metal and wood jointing planes). I don't use a shooting board, although other makers I know do... Some make the plane stationary and run the plate/joint over the blade. Others make the plate stationary and run the plane over the joint. I've done both.
When gluing, some makers clamp the joint, others just rub the joint 'till it "sticks" and set it off to the side. I've also done both, but prefer a rubbed joint. I feel it confirms that the joint was well concieved. Nothing preventing one from doing both, however (rubbing then clamping).
I feel a bit odd linking threads from another discussion site, so I won't, but if you visit Maestronet discussion boards and use the search function to find threads in "The Pegbox" under "joining plates", there is quite a bit of information/opinion posted there.
_________________
Jeffrey
http://holmesviolins.com |
|
| Back to top |
|
|
Dave Chandler
Super Member
Joined: 31 Oct 2007
Posts: 691
Location: Mt Mitchell in North Carolina
|
| Posted: Sat Nov 10, 2007 5:00 pm Post subject: Joining back |
|
|
Thanks Jeffrey, I'll check that. It may be that just fine-tuning the blades is what is holding me back from having a good result. Will try again, and will definitely visit the Maestronet site (but I'll be back!).
_________________
Dave in the Blue Ridge
Southern Violin Association
"Success is the ability to go from one failure to the next with no loss of enthusiasm" Winston Churchill
"I took the road less travelled, and now I don't know where I am." Marco Polo |
|
| Back to top |
|
|
H.R.Fisher
Junior Member
Joined: 18 Apr 2007
Posts: 12
Location: Mifflin PA. USA
|
| Posted: Sat Nov 10, 2007 5:40 pm Post subject: |
|
|
Hi Bulerias, The perfectly adjusted power jointer in my sons cabinet shop makes this process a breeze,don't tell anybody.  Henry Henry |
|
| Back to top |
|
|
Jeffrey Holmes
Member
Joined: 03 Apr 2007
Posts: 90
Location: Ann Arbor
|
| Posted: Sat Nov 10, 2007 5:55 pm Post subject: Re: Joining back |
|
|
| Dave Chandler wrote: | | It may be that just fine-tuning the blades is what is holding me back from having a good result. |
The sole and the blade bed almost always need as much work as the blade and chip guard... but it's worth it in the end.
_________________
Jeffrey
http://holmesviolins.com |
|
| Back to top |
|
|
bulerias1981
Member
Joined: 16 Jun 2007
Posts: 41
Location: Beacon, NY
|
| Posted: Sat Nov 10, 2007 7:03 pm Post subject: |
|
|
I'm pretty sure my planes are in tune. I think for me its a matter of technique. How to clamp the piece of wood. Since the wood that I'm planing is about 30 mm wide or so, making the edges of the plane sole not flat and stable on the piece of wood. Making it possible for the plane even to tilt, also rendering it difficult to hold while planing.
I've spent about 4 hours or more total trying to do this. I'm at the point of going mad! I've used my small Lie-Nielsen block plane, my Stanley block plane which is a bit bigger, and even my Stanley no. 5 plane, which is about 14" long. The blades are all very sharp. I even tried brushing on hot water to the joint edges, making it a bit easier to cut while push the plane on the wood. Also put paraffin on the sole of the plane.
Tried a shooting board, but I rather do this with a plane. I also don't want to use a electric jointer. I need to aquire this skill. Many violin-makers join the backs and sides. So this is something I should learn.
I need a new approach. Probably start with how I'm clamping the wood, how I'm planing.
So I'll refine my questions here.
1) What planes do you use? (if multiple, what sequence)
2) What is your method? (clamping the wood, and working with the plane)
3) Do you use tricks such as chaulk, wetting the jointing edge and so on.
I have checked in the pegbox forum, and no one really gets into detail. Thats what I'm trying to get at. If anyone is as kind to help us new amateurs along with this, my deepest gratitude would naturally be given. Thanks.
_________________
"I only write the notes as written, it is god that creates the music." J.S. Bach |
|
| Back to top |
|
|
KenN
Member
Joined: 27 Mar 2007
Posts: 89
Location: Goodrich, MI
|
| Posted: Sat Nov 10, 2007 10:18 pm Post subject: |
|
|
I always have more trouble with the belly. Hold the joint together and look for gaps while holding it up to a bright light. Check both sides. I use a block plane to get it so there are no gaps, then finish it off with a joiner.
You might try clamping the plane in a vise and sliding the wood on it. That eliminates any twist or bending the vise may put in the wood. You could be clamping the plates too tight, planing them flat, and then when you take them out of the vise they're not flat anymore. |
|
| Back to top |
|
|
Jeffrey Holmes
Member
Joined: 03 Apr 2007
Posts: 90
Location: Ann Arbor
|
| Posted: Sat Nov 10, 2007 11:05 pm Post subject: |
|
|
OK; I'll try. Some of what I mention you may already be doing... but I don't think getting too detailed will hurt anyone but me. 
First I flatten the face of the plates (so that there is no twisting or cupping), as I use that surface for a reference.
| bulerias1981 wrote: | | 1) What planes do you use? (if multiple, what sequence) |
First a block plane, then a jointer plane. I spent hours, years ago, flattening the soles of the metal planes (both block and jointer). If I'm going to use the wooden jointer, I true it up (flat) with the block plane before starting the job.
I sharpen the blades with a very slight crown (handy for taking care of small twists, as you'll know where the heavy cut will be) and, once the surface is “in range” set the depth for the finest cut I can get without skipping.
| Quote: | | 2) What is your method? (clamping the wood, and working with the plane) |
I start the block plane stroke with slight pressure on my fingers at the front of the plane and end the stroke with that same pressure with my palm. I check that the joint stays square with the face of the plate (pretty much) after every cut.
As long as the force is along the joint face and not so much downward, you really should be able to keep the plane from tipping (even on surfaces less than 30 mm wide). You can use your other hand to help steady the block plane and keep the contact even. It does take a little practice, but if you still can't get a nice surface, I'm afraid I'll point you back to the plane setup again.
To finish the joint (after the block plane) I either continue with the wood clamped the vise (carefully; using spacers to prevent twisting and a "stop" to prevent travel), or clamp the plane down and run the joint over the sole. If I'm using the wood plane I clamp the butt end in the tail vise and a heavy stick to the shop floor at the head end; you can adjust the stick length to give you a comfortable working angle. If I'm using the metal plane, I'm less likely to clamp it up, but if I do I use the other vise.
I do employ a "spring joint", but the gap in the center is very, very slight.
| Quote: | | 3) Do you use tricks such as chaulk, wetting the jointing edge and so on. |
No chalk, no water. I keep a pencil around in the initial stages (squaring and flattening with the block plane). Before gluing, I’ll warm the joint surfaces with a hair drier. I use a good straightedge and a granite slab when flattening the face of the plates.
_________________
Jeffrey
http://holmesviolins.com |
|
| Back to top |
|
|
bulerias1981
Member
Joined: 16 Jun 2007
Posts: 41
Location: Beacon, NY
|
| Posted: Sun Nov 11, 2007 7:55 am Post subject: |
|
|
Very nice. That is very helpful. Thank you! I'll let you know how it goes.
How do you go about achieving a spring joint? I assume its planed flat first.
I've joined a top plate with little to no problem. But this maple is giving me grief. The hardness of the wood naturally makes it harder to push the plane even with a smaller setting on the blade. I wonder if its this particular wood as well.
_________________
"I only write the notes as written, it is god that creates the music." J.S. Bach |
|
| Back to top |
|
|
Jack H.
Super Member
Joined: 24 Mar 2007
Posts: 346
Location: Israel
|
| Posted: Sun Nov 11, 2007 2:53 pm Post subject: |
|
|
| bulerias1981 wrote: | I'm pretty sure my planes are in tune. I think for me its a matter of technique. How to clamp the piece of wood. Since the wood that I'm planing is about 30 mm wide or so, making the edges of the plane sole not flat and stable on the piece of wood. Making it possible for the plane even to tilt, also rendering it difficult to hold while planing.
I've spent about 4 hours or more total trying to do this. I'm at the point of going mad! I've used my small Lie-Nielsen block plane, my Stanley block plane which is a bit bigger, and even my Stanley no. 5 plane, which is about 14" long. The blades are all very sharp. I even tried brushing on hot water to the joint edges, making it a bit easier to cut while push the plane on the wood. Also put paraffin on the sole of the plane.
Tried a shooting board, but I rather do this with a plane. I also don't want to use a electric jointer. I need to aquire this skill. Many violin-makers join the backs and sides. So this is something I should learn.
I need a new approach. Probably start with how I'm clamping the wood, how I'm planing.
So I'll refine my questions here.
1) What planes do you use? (if multiple, what sequence)
2) What is your method? (clamping the wood, and working with the plane)
3) Do you use tricks such as chaulk, wetting the jointing edge and so on.
I have checked in the pegbox forum, and no one really gets into detail. Thats what I'm trying to get at. If anyone is as kind to help us new amateurs along with this, my deepest gratitude would naturally be given. Thanks. |
A good shooting board makes it so much easier.
Do not make the angle on the shooting board 90 degrees, make it 85 or 6 or 7. This gives you room to work. Have the board surface and the plane surface of the shooting board paralell.
plane blades must be straight and SHARP enough to shave with.
Plane sole should be as flat as possible.
plane should also cut an even thickness on the left side as it does on the right side. this will let you know that the joint will be at 90 degrees ( assuming that the bottom is beautifully flat.
Parafin on the plane sole will not help the strenght of the glue joint!!!!!!!
Staw y away from sanding this joint. sand paper is not made for straightning and flattening, it is generally used for countour forms.
I use a large Bailly plane for the rough work on the joint, getting the joint paralell with the grain lines and getting the joint to 90 degrees.
I go with my stanley for the rest of the final work..
Planing maple is harder than spruce.
Sometimes it helps to turn the blade a bit so it is not perpendicular tot he wood being planed. it helps to cut across the wood in more of a slicing motion as opposed to a blunt cutting one. This is hard to do with a shooting board but easier to do when the wood is in a vise. ( the plusses and minuses of a shooting board and a vise.)
the depth of the plane should be minimal. makes for easier planing.
since you do not want to use a shooing board, vise the wood and get a good starrett square.
hold the plane slightlya angled from perpendivular to the wood.
One hand on the front and one hand on the back and take a nice smooth steady quick stroke.
measure for straight adn mark high spots remove until flat.
any thing I missed?
Let me know.
J |
|
| Back to top |
|
|
Jeffrey Holmes
Member
Joined: 03 Apr 2007
Posts: 90
Location: Ann Arbor
|
| Posted: Sun Nov 11, 2007 6:58 pm Post subject: |
|
|
| bulerias1981 wrote: | | How do you go about achieving a spring joint? I assume its planed flat first. |
As long as the plane is tuned properly, the (very) slight hollow can be obtained by placing a biy more pressure on the plate as you're running it over the blade, or more pressure on the plane as you're running it over the plate.
| Quote: | | I've joined a top plate with little to no problem. But this maple is giving me grief. The hardness of the wood naturally makes it harder to push the plane even with a smaller setting on the blade. I wonder if its this particular wood as well. |
Maple does take a bit more effort, but I'd take a close look at the plane (tuning) and especially at the blade (grind angle and honing/sharpening) to make sure everything is dead-on.
As Jack suggests, turning the plane so that it's not running quite at a 90 degree angle to the work surface can help, especially with the block plane. Which way to turn it depends on the split of the wood and the figure.
Jack's mention of the shooting board is a case in point concerning working styles. He mentioned that it's quite a bit easier for him using one. I find them to be a pain. Just depends on what you're used to. Different ways to get the job done.
_________________
Jeffrey
http://holmesviolins.com |
|
| Back to top |
|
|
Dave Chandler
Super Member
Joined: 31 Oct 2007
Posts: 691
Location: Mt Mitchell in North Carolina
|
| Posted: Sun Nov 18, 2007 10:11 pm Post subject: Joining plates |
|
|
I spent the better part of a day reworking my plane, and then working on technique with some 24" long pine 2x4s until I had a perfect seam. It seems good sharp plane is just the starting point, then working the technique to find that last little high spot. Time well spent. Thanks for all the suggestions.
On the side ---- Wifey-poo says I gotta sell something before I can order more wood. I've got 4 violins now, so guess I'll sell my hunting rifle. God knows I need all these violins.
_________________
Dave in the Blue Ridge
Southern Violin Association
"Success is the ability to go from one failure to the next with no loss of enthusiasm" Winston Churchill
"I took the road less travelled, and now I don't know where I am." Marco Polo |
|
| Back to top |
|
|
bulerias1981
Member
Joined: 16 Jun 2007
Posts: 41
Location: Beacon, NY
|
| Posted: Sat Dec 22, 2007 5:21 pm Post subject: |
|
|
Ok gentleman,
After spending nearly 3 months on trying to join the back, Ive nearly thrown down the towel. I've been going crazy trying to do this.
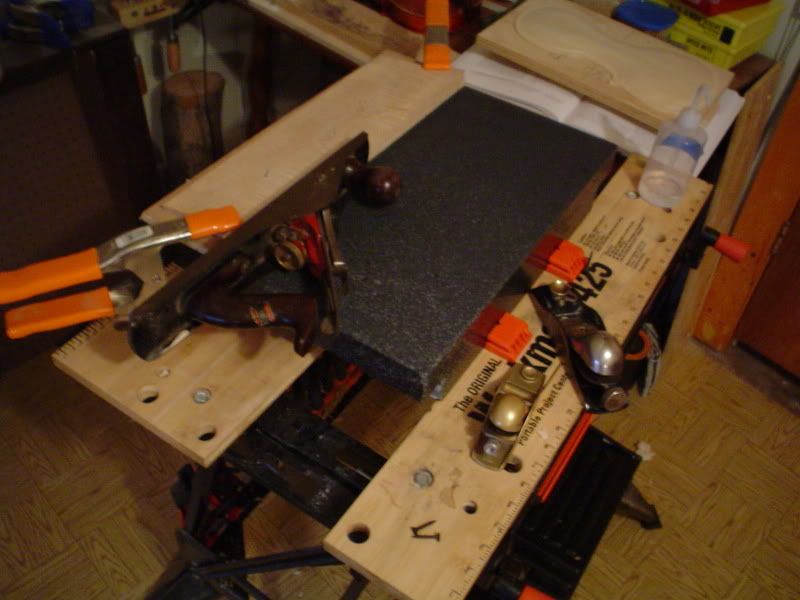
I have ground my 3 planes dead flat. To do this, I bought a 18"x12" slab of granite that machinists use to check flatness on objects. I put different grits of emery cloth down with a spray adhesive and ground the soles of the planes on here. This is what the flatness is like on my planes..
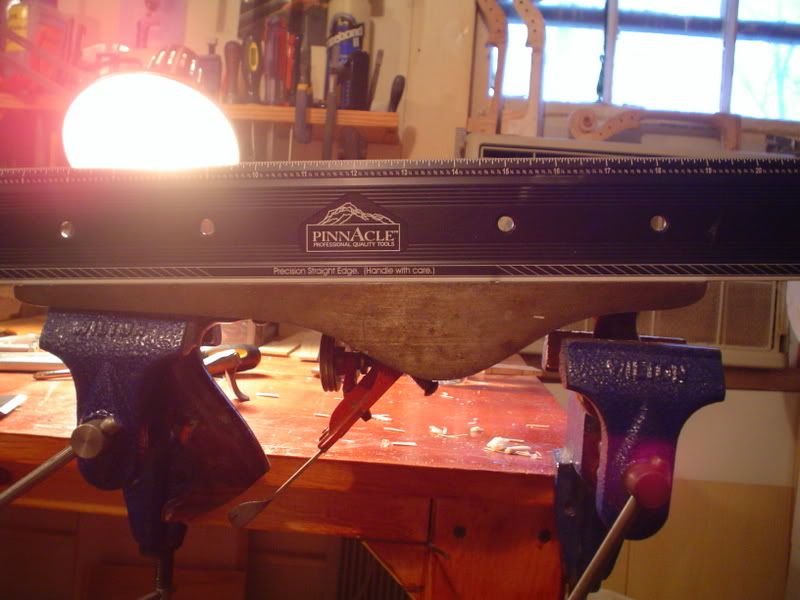
I've tried different methods or techniques to join. I've tried clamping and planing the top...

I've also tried using the granite slab and a plane on its side while the wood being clamped down to the surface..
I have also tried wetting the edges to make the cuts easier, I've tried chaulk and so on.
I just cannot seem to get the entire joining surface to contact completely. There is always this annoying gap somewhere. My plane blades are sharp as hell, I even tuned the chip breaker on my jointer plane. I sharpened the blades on dimond stones, so I know the cutting surface is straight. Also checked to verify. I've tried all my hand planes, I've even tried a shooting board, but didn't get far with that. I want to develope the skill to do this with a plane.
As far as the techniques go, has anyone done it any of those ways?
_________________
"I only write the notes as written, it is god that creates the music." J.S. Bach |
|
| Back to top |
|
|
|
|
You cannot post new topics in this forum
You cannot reply to topics in this forum
You cannot edit your posts in this forum
You cannot delete your posts in this forum
You cannot vote in polls in this forum
|
Powered by phpBB © 2001, 2005 phpBB Group
|

