| View previous topic :: View next topic |
| Author |
Message |
bulerias1981
Member
Joined: 16 Jun 2007
Posts: 41
Location: Beacon, NY
|
 Posted: Sat Dec 22, 2007 5:22 pm Post subject: Posted: Sat Dec 22, 2007 5:22 pm Post subject: |
 |
|
Ok gentleman,
After spending nearly 3 months on trying to join the back, Ive nearly thrown down the towel. I've been going crazy trying to do this.
I have ground my 3 planes dead flat. To do this, I bought a 18"x12" slab of granite that machinists use to check flatness on objects. I put different grits of emery cloth down with a spray adhesive and ground the soles of the planes on here. This is what the flatness is like on my planes..
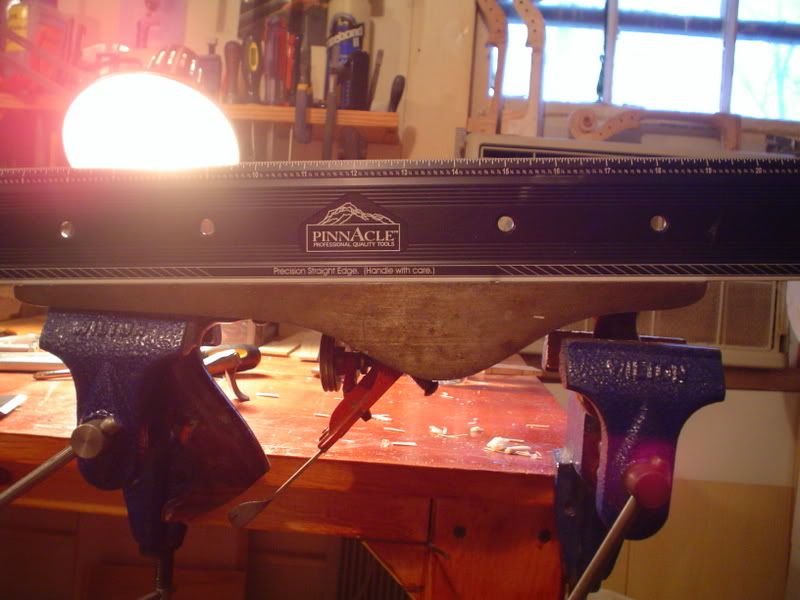
I've tried different methods or techniques to join. I've tried clamping and planing the top...

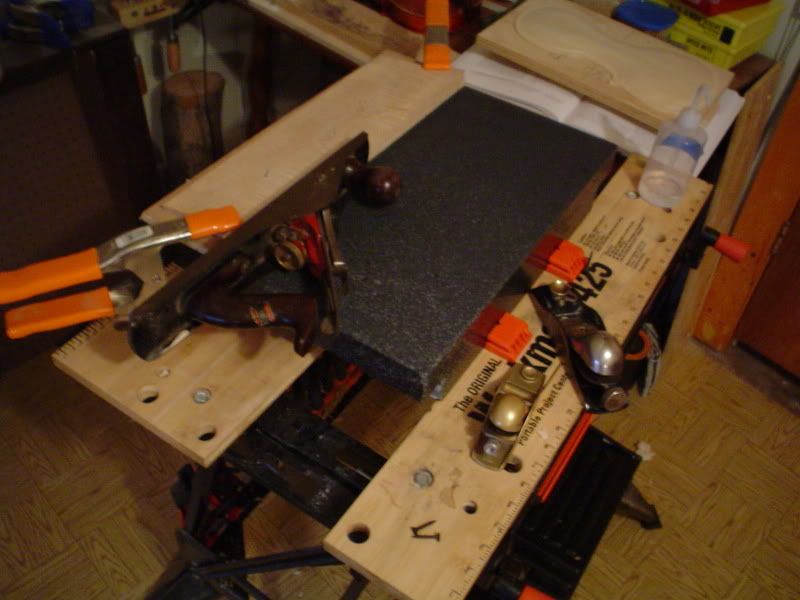
I've also tried using the granite slab and a plane on its side while the wood being clamped down to the surface..
I have also tried wetting the edges to make the cuts easier, I've tried chaulk and so on.
I just cannot seem to get the entire joining surface to contact completely. There is always this annoying gap somewhere. My plane blades are sharp as hell, I even tuned the chip breaker on my jointer plane. I sharpened the blades on dimond stones, so I know the cutting surface is straight. Also checked to verify. I've tried all my hand planes, I've even tried a shooting board, but didn't get far with that. I want to develope the skill to do this with a plane.
As far as the techniques go, has anyone done it any of those ways?
_________________
"I only write the notes as written, it is god that creates the music." J.S. Bach |
|
| Back to top |
|
 |
Jeffrey Holmes
Member
Joined: 03 Apr 2007
Posts: 90
Location: Ann Arbor
|
| Posted: Sun Dec 23, 2007 12:57 pm Post subject: |
|
|
Well... don't know if this will help you, but I think I mentioned that I don't sharpen the blades so that they are "straight", but rather, very slightly crowned (to allow a bit more control in the cut).
Also, as I believe I mentioned (either here or in a similar thread on Maestronet), I employ a "spring" joint; a very, very slight hollow along the length of the joint evenly tapered from end to end... not contact from end to end. Once glue is applied, this hollow is sucked closed (and the ends of the join stays tight).
_________________
Jeffrey
http://holmesviolins.com
Last edited by Jeffrey Holmes on Sun Dec 23, 2007 9:53 pm; edited 1 time in total |
|
| Back to top |
|
|
MANFIO
Super Member
Joined: 11 Apr 2007
Posts: 458
Location: Sao Paulo
|
| Posted: Sun Dec 23, 2007 5:08 pm Post subject: |
|
|
Perhaps you could visit a maker or a good cabinet maker with your plane and your wood, and see how he works. You will have the oportunity to see some things like how to position and move your body as you plane, how to aply the pressure on the plane and, finally, he can give a look in your plane.
_________________
www.manfio.com
http://www.flickr.com/photos/7875988@N02/with/464604020/ |
|
| Back to top |
|
|
MANFIO
Super Member
Joined: 11 Apr 2007
Posts: 458
Location: Sao Paulo
|
| Posted: Sun Dec 23, 2007 5:09 pm Post subject: |
|
|
Perhaps you could visit a maker or a good cabinet maker with your plane and your wood, and see how he works. You will have the oportunity to see some things like how to position and move your body as you plane, how to aply the pressure on the plane and, finally, he can give a look in your plane.
_________________
www.manfio.com
http://www.flickr.com/photos/7875988@N02/with/464604020/ |
|
| Back to top |
|
|
Dave Chandler
Super Member
Joined: 31 Oct 2007
Posts: 691
Location: Mt Mitchell in North Carolina
|
| Posted: Sun Dec 23, 2007 5:27 pm Post subject: Joining back |
|
|
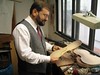
I came across interesting site that talks about the Chicago School of Violin Making, and the slide show below. One of the photos shows a maker/student using an interesting setup for planing the back.
http://www.taunton.com/finewoodworking/AudioSlideshow/28463/28463.swf
_________________
Dave in the Blue Ridge
Southern Violin Association
"Success is the ability to go from one failure to the next with no loss of enthusiasm" Winston Churchill
"I took the road less travelled, and now I don't know where I am." Marco Polo |
|
| Back to top |
|
|
violinarius
Member
Joined: 14 Dec 2007
Posts: 171
|
| Posted: Sun Dec 23, 2007 6:55 pm Post subject: |
|
|
I haven't read the whole thread, so please forgive me if I am repeating something.
I was taught to just lightly clamp the wood, or else the pressure from the clamps will distort the wood enough to cause it to not be flat when the pressure is released.
This goes the same for the plane if you decide to clamp it instead of the wood.
If you have a nice straight edge, then you can hold the wood up to the light with the straight edge lying on the just planed surface, and see where the bumps are. You need to take partial shavings that are very thin, where the bumps are, then you try to get a shaving that is the full length of the board.
If you do get it flat, then don't touch the joint with your fingers, to keep from contaminating the surface, and it is best to glue it up as soon as possible, because wood moves. |
|
| Back to top |
|
|
Jeffrey Holmes
Member
Joined: 03 Apr 2007
Posts: 90
Location: Ann Arbor
|
| Posted: Sun Dec 23, 2007 9:48 pm Post subject: Re: Joining back |
|
|
Actually, that's one of the co-directors, Rebecca Elliot.
I think I mentioned "Some make the plane stationary and run the plate/joint over the blade. Others make the plate stationary and run the plane over the joint. I've done both." The slide show shows the method I (still) use when clamping the wooden plane... the method learned when I attended that school many years ago.
_________________
Jeffrey
http://holmesviolins.com |
|
| Back to top |
|
|
DonLeister
Moderator
Joined: 29 Mar 2007
Posts: 383
Location: Richmond, VA
|
| Posted: Mon Dec 24, 2007 1:26 pm Post subject: |
|
|
A couple of questions, when you hold the plane and clamp the boards, are you planing one or two pieces at a time?
Can you set the blade so that it takes a very thin shaving off, like even and almost transparent?
I like it when my plane (doing the final planing) will not cut unless I put downward pressure on it while pushing it along the wood.
After initial planing, I spot the gap and also where the wood is touching , then plane the place(s) where the wood touches. Sometimes I will only plane one side to fit the other.
I have also just sanded the edges on a flat sanding board or slab, but if you do that you do not want to go over it with a plane , since the grit gets into the would and it will dull a blade.
I hpe this helps! |
|
| Back to top |
|
|
jethro
Member
Joined: 07 Apr 2007
Posts: 178
|
| Posted: Tue Dec 25, 2007 4:40 am Post subject: planning center joint ... |
|
|
bulerias:
Put my plane up side down in milling machine and took cut off with 3 inch
carbide fly cutter. Then polished it with pneumatic scotchbrite. It is FLAT
now ! Sharpened blade with Norten waterstones 220-8000 (their starter kit - It works great) and then stropped on leather. Blade is sharp and
square. With carefull adjustment I can get a 4-6 inch long shaving that
I can see through. It will go less but it isn't a shaving at that point. It is
just a cheap 35 $ stanley plane.
All that said..... I can get the joints very close but there is allways places
where touching and not touching. (my sole is only 5 or 6 inches) So I
have to mark the high spots and gradualy work them down localy untill
the joint looks good. Usualy takes about 1 hour to get perfect. I get it
fine till that point but I can't get the stupid "rubbed" joint to work !!!!!!!!!
(see my other post - I've asked for help there! )
I suspect you may allways have to manualy levle the surface no matter
how long the sole of the plane is !
I will watch the other post hoping someone can help me with the "magic"
joint !
Tim |
|
| Back to top |
|
|
bulerias1981
Member
Joined: 16 Jun 2007
Posts: 41
Location: Beacon, NY
|
| Posted: Tue Dec 25, 2007 8:47 pm Post subject: |
|
|
Yes. I plane only one piece at a time then check for fit.
I sharpened my plane blades with 320 grit DMT stone, then 650 is the finest I have. (Should I get a finer grit? I see people using 8000)
I have it set for the finest shaving that I can get. Its transparent but sometimes the consistancy isn't exact. I'll have a little bit of the edge not cut or sometimes even the middle. Also, even at that fine setting, it takes alot of downward pressure to be able to cut. Otherwise I just chatter or even get caught.
I put a slight bevel on the cutting edge of about 3-5 degrees or so.
Jethro, what kind of plane you use? Hand plane or bench?
_________________
"I only write the notes as written, it is god that creates the music." J.S. Bach |
|
| Back to top |
|
|
KenN
Member
Joined: 27 Mar 2007
Posts: 89
Location: Goodrich, MI
|
| Posted: Tue Dec 25, 2007 9:28 pm Post subject: |
|
|
| I don"t know if I'm the only one, but I don't like to put much pressure at all on the plane or the board. Just slide them across. If it doesn't cut, it isn't sharp enough. I use a try plane I bought for $5 at a flea market years ago that's 18" long. I made a .2" thick chipbreaker, like a Hock chipbreaker, so it is like a rock. The worst thing about it is the sole is "corrogated". But that does force me to slide the wood across it at an angle. If you like to clamp the wood, and not the plane be extra careful how you clamp it because it will warp very easily. Put a warped piece of wood on a flat surface and it doesn't take much to push it down flat. Try clamping end to end, it is harder to bend it that way. |
|
| Back to top |
|
|
DonLeister
Moderator
Joined: 29 Mar 2007
Posts: 383
Location: Richmond, VA
|
| Posted: Wed Dec 26, 2007 11:11 pm Post subject: |
|
|
Had any success lately with the joining?
How about planing two pieces at a time, after you have planed the underside of the pieces flat (plates) first. Get them close enough to flat that they don't deform when you clamp them together (if you havn't already), they should be tight together up at the edges you are planing. You might want to try some larger clamps that hold the pieces closer to their center.
After that, I usually plane one piece to fit the other, not a whole lot, and with a smaller plane, I see that you have one.
Something that helps is to have the wedges not too thick, maybe 3/4" max, that way you are fitting less area of wood. ( leave it thick enough to get your arch height after the joined pieces have been made flat on the underside).
About stones, I'm not sure what you have, but I go from the grinder to a fine diamond stone then a very fine barber stone, I'm not sure of the grit, it mostly polishes the edge.
Let us know |
|
| Back to top |
|
|
jethro
Member
Joined: 07 Apr 2007
Posts: 178
|
| Posted: Wed Dec 26, 2007 11:45 pm Post subject: plane blade.... |
|
|
Bilerias:
You mentioned that you have to put some pressure downward to make the
blade bite and puck up a shaving- or sometimes you get chatter....
That makes me thing your blade is not REALLY sharp yet. I think from
what I have experienced using the Norton set (220-1000-4000-8000)
and then the leather strop that you are missing out on a lot of sharpness!
When I am cutting a very thin shaving (see through it) It takes all most
no pushing force to go across (maybe 3-5 lbs) . I can feel the wood
gradualy going away from underneath the sole untill there is just a slide
across with no blade contact - but not using any increased pressure down.
Check these stones in woodcraft or one of the wood catalogs. I think the
set of 2 double sided stones and the flattening stone + guide is about
100-120 $ . They work really well and very quick to touch up while
working. I can touch up the blade and be back ready to go in 2 min.
My plane is just a cheap 18 $ stanley bench plane- about an 7 or 8 inch
sole (which was croked as a dog's leg before I milled it ! )
Tim |
|
| Back to top |
|
|
violinarius
Member
Joined: 14 Dec 2007
Posts: 171
|
|
| Back to top |
|
|
|
|
You cannot post new topics in this forum
You cannot reply to topics in this forum
You cannot edit your posts in this forum
You cannot delete your posts in this forum
You cannot vote in polls in this forum
|
Powered by phpBB © 2001, 2005 phpBB Group
|

