| View previous topic :: View next topic |
| Author |
Message |
MikeCooper
Member
Joined: 08 Nov 2023
Posts: 29
Location: USA Georgia
|
 Posted: Sun Nov 12, 2023 3:28 am Post subject: My violin build Posted: Sun Nov 12, 2023 3:28 am Post subject: My violin build |
 |
|
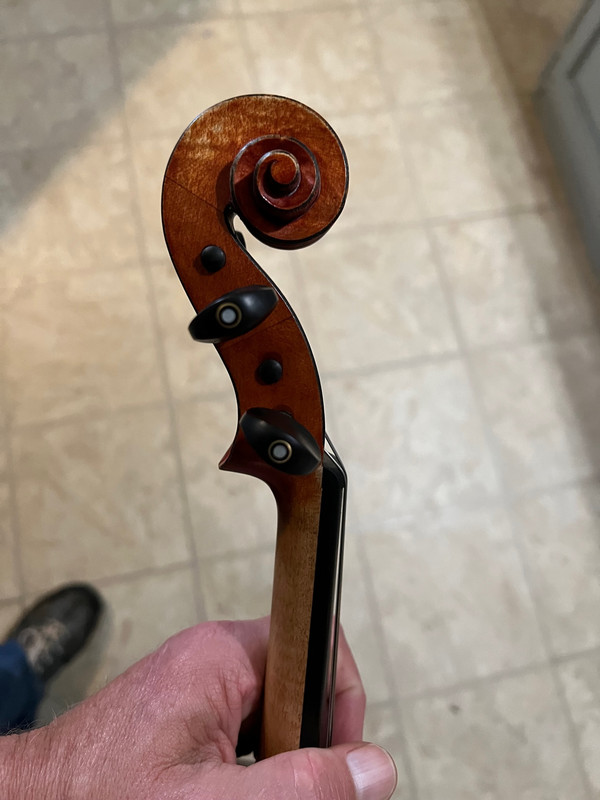
I am about to begin violin build number two. Starting off with a picture of the results from the first build. Showing back, belly, sides and scroll. And my little gnome mascot.
 ] ] |
|
| Back to top |
|
 |
Michael Darnton
Moderator
Joined: 23 Mar 2007
Posts: 1281
Location: Chicago
|
|
| Back to top |
|
|
MikeCooper
Member
Joined: 08 Nov 2023
Posts: 29
Location: USA Georgia
|
| Posted: Sun Nov 12, 2023 10:10 pm Post subject: |
|
|
| Hi Michael. I'll try to repost better photos. |
|
| Back to top |
|
|
MikeCooper
Member
Joined: 08 Nov 2023
Posts: 29
Location: USA Georgia
|
| Posted: Sun Nov 12, 2023 10:13 pm Post subject: |
|
|
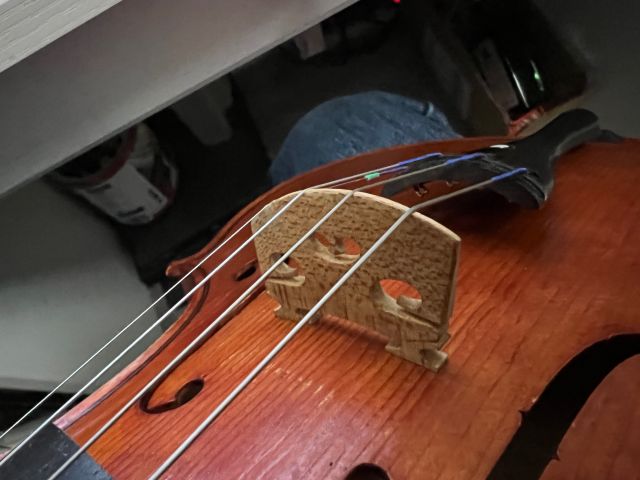
Let's see if this works. This is the back of the one I recently finished. I'm using a website called postimage.cc to store the images. If this works, I'll post front, sides and scroll.
 |
|
| Back to top |
|
|
Michael Darnton
Moderator
Joined: 23 Mar 2007
Posts: 1281
Location: Chicago
|
|
| Back to top |
|
|
MikeCooper
Member
Joined: 08 Nov 2023
Posts: 29
Location: USA Georgia
|
| Posted: Mon Nov 13, 2023 1:25 pm Post subject: |
|
|
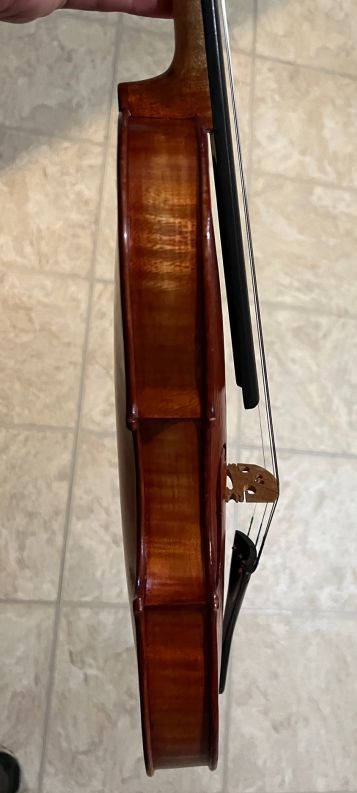
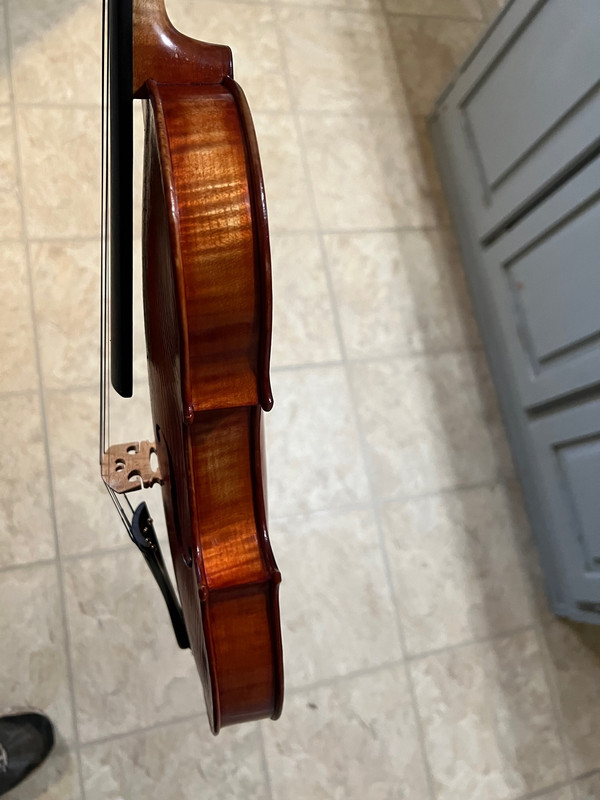
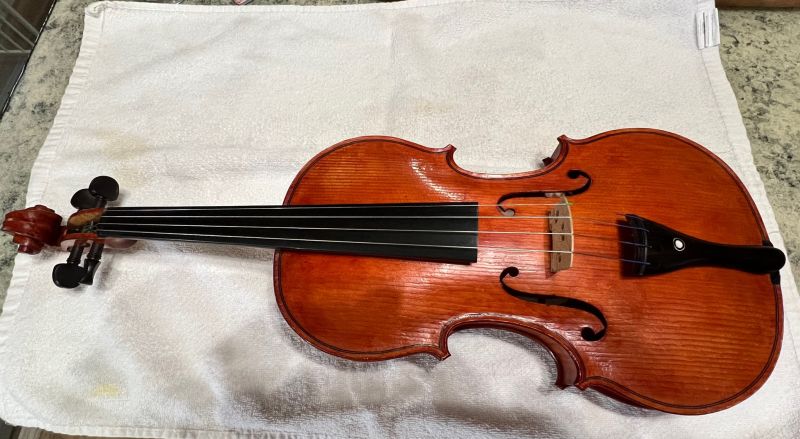
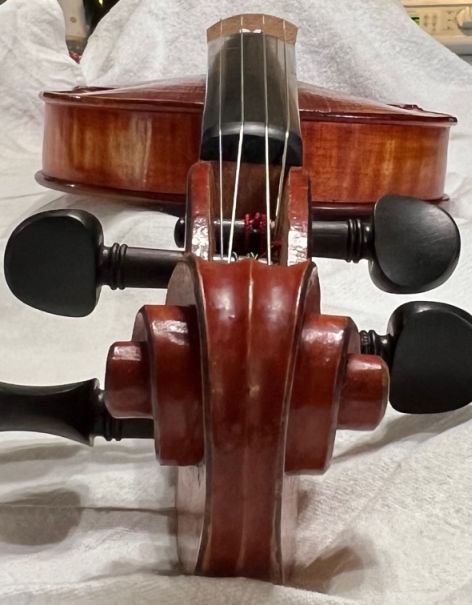
Ok, here are a few more pictures of my first build. I think it turned out ok for a first, although there are certainly areas for improvement.
I tried to do a little lite antiquing without going overboard with it. I have no experience in antiquing and didn't want it to look amateurish.
I didn't notice a crack in the pegbox until after the neck was glued to the body so I glued the crack and installed cheek patches for extra strength.
 |
|
| Back to top |
|
|
MikeCooper
Member
Joined: 08 Nov 2023
Posts: 29
Location: USA Georgia
|
| Posted: Fri Nov 17, 2023 6:42 pm Post subject: |
|
|
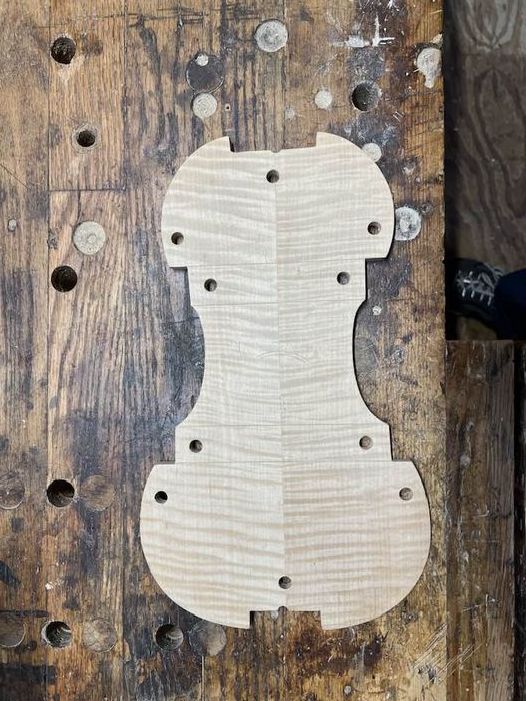
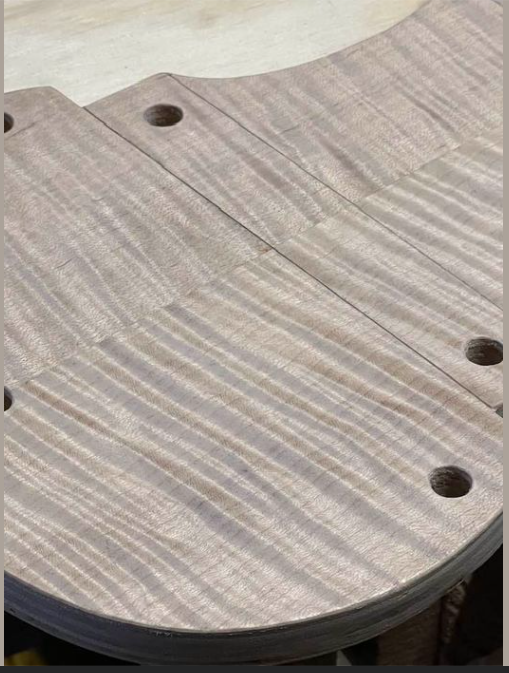
As usual, I make slow progress. Here's the P form half way completed. I still want to put a veneer on the other side. This side is complete except for putting some kind of finish on it. Probably I'll use some dye and some linseed oil.
For a ground I like to use horse/rabbit sauce and fustic for some golden tone. I don't make the sauce since I don't have a horse or a rabbit. Someone sent me a sample.
I spent the day reading Librum Segretti de Butega, it's very interesting.
 |
|
| Back to top |
|
|
Michael Darnton
Moderator
Joined: 23 Mar 2007
Posts: 1281
Location: Chicago
|
|
| Back to top |
|
|
MikeCooper
Member
Joined: 08 Nov 2023
Posts: 29
Location: USA Georgia
|
| Posted: Sun Nov 19, 2023 11:55 am Post subject: |
|
|
It's 60 mm wide but only 12mm deep. I can deepen it to 18mm.
That makes me wonder about original Strads. Has the neck block been replaced with modern size on most of them?
If so then how does that work with the original glueing surface of the top and back plates? The original glue surface of the plates would be shorter wouldn't it? |
|
| Back to top |
|
|
Michael Darnton
Moderator
Joined: 23 Mar 2007
Posts: 1281
Location: Chicago
|
| Posted: Sun Nov 19, 2023 12:48 pm Post subject: |
|
|
There's plenty of room inside for a new block, and most classical period violiins don't have their original--I've seen maybe five or six, only. A lot of people try to get quickly down to 2.5mm, whatever the upper bout is, as fast as possible away from the block, but that's not how these violins are. The grads all around the edge are gradual decreases. Nothing is gained by cutting wood away as much as possible towards the linings and blocks.
_________________
new blog at my site! http://darntonviolins.com/blog
my work sites: http://darntonviolins.com and http://darntonhersh.com |
|
| Back to top |
|
|
MikeCooper
Member
Joined: 08 Nov 2023
Posts: 29
Location: USA Georgia
|
| Posted: Mon Nov 20, 2023 4:32 pm Post subject: |
|
|
I deepened the neck block mortice to 18mm and finished veneering the back side and put a lite application of dye. It's a watered down dye and only gives a hint of color.
I don't know if I'll get to work on the end blocks and corner blocks this week with Thanksgiving holiday activities but I'll get those done soon and post pictures. |
|
| Back to top |
|
|
MikeCooper
Member
Joined: 08 Nov 2023
Posts: 29
Location: USA Georgia
|
| Posted: Tue Nov 21, 2023 4:33 pm Post subject: |
|
|
Nearly finished. Applied a lite stain, not enough to harm the chatoyance. I may finish it with shellac or maybe linseed oil.
Blocks soon...
 |
|
| Back to top |
|
|
MikeCooper
Member
Joined: 08 Nov 2023
Posts: 29
Location: USA Georgia
|
| Posted: Sun Nov 26, 2023 4:34 pm Post subject: |
|
|
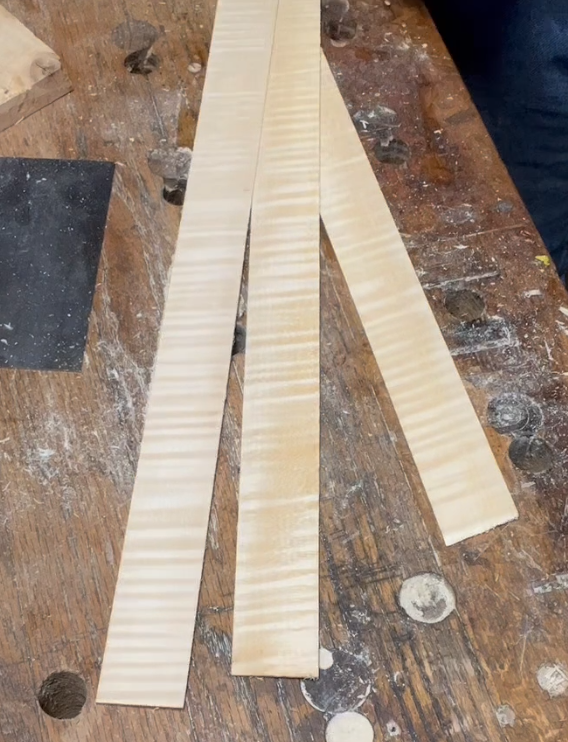
I started preparing some rib blanks, just smoothing the surface for now. They are still 1.5mm thick so I'll have to thin them down some more.
Here's a link to my youtube video.
https://www.youtube.com/watch?v=Eg0OfVK4jF8
 |
|
| Back to top |
|
|
MikeCooper
Member
Joined: 08 Nov 2023
Posts: 29
Location: USA Georgia
|
|
| Back to top |
|
|
MikeCooper
Member
Joined: 08 Nov 2023
Posts: 29
Location: USA Georgia
|
|
| Back to top |
|
|
|


