| View previous topic :: View next topic |
| Author |
Message |
MANFIO
Super Member

Joined: 11 Apr 2007
Posts: 458
Location: Sao Paulo
|
 Posted: Wed Feb 20, 2008 7:15 am Post subject: Posted: Wed Feb 20, 2008 7:15 am Post subject: |
 |
|
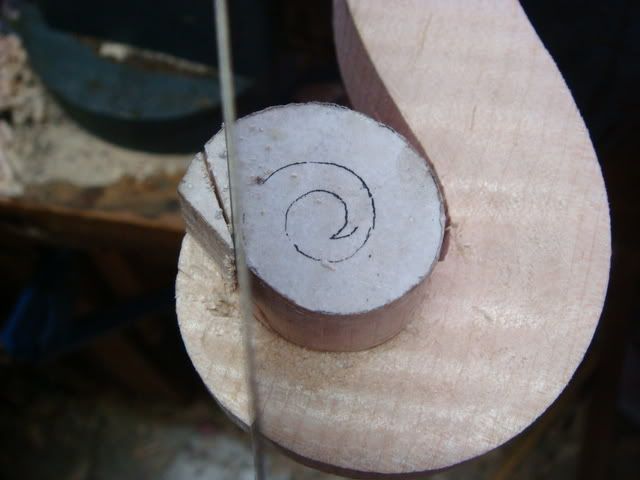
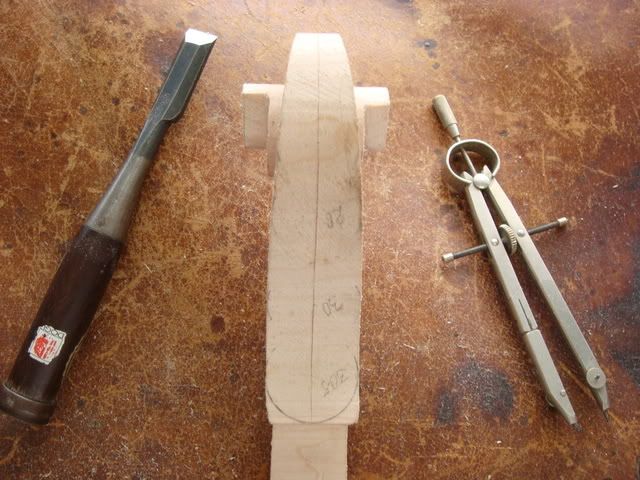
Well, I should do that, mainly now that I'm making many of this viola model... And I would have to stop working to make the template and, eventually, I would not find it in my messed workshop when needed...
My father used to draw directly in the wood with rules and dividers, I took this mania from him...
_________________
www.manfio.com
http://www.flickr.com/photos/7875988@N02/with/464604020/ |
|
| Back to top |
|
 |
jessupe goldastini
Member
Joined: 25 Apr 2007
Posts: 169
Location: sana' rafaela'
|
| Posted: Wed Feb 20, 2008 11:49 am Post subject: |
|
|
great info for those who need it....
manfio you are a great an and will be rembered for many things, sharing what you know will be high on the list....
as for you as for me
love something and set it free |
|
| Back to top |
|
|
MANFIO
Super Member
Joined: 11 Apr 2007
Posts: 458
Location: Sao Paulo
|
| Posted: Wed Feb 20, 2008 2:25 pm Post subject: |
|
|
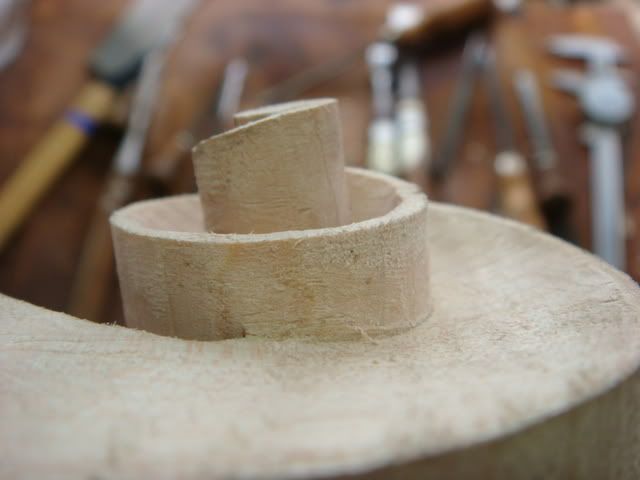
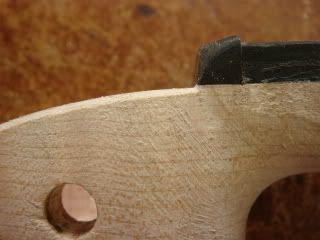
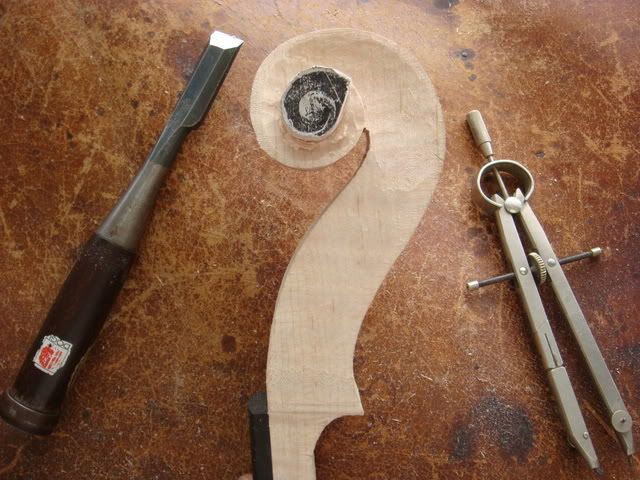
Here I'm cutting the walls with a gouge.
More cuts:
Again the use o small rasp to reach the line, then I use the gouge again:
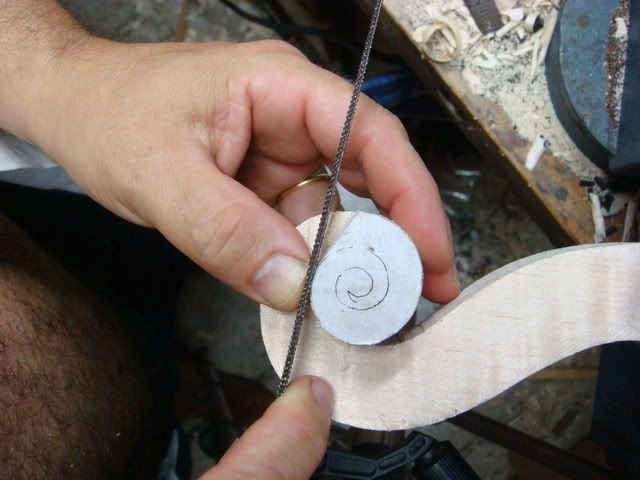
Making it deeper:

Correcting the curves with a small sculptor's curved rasp:
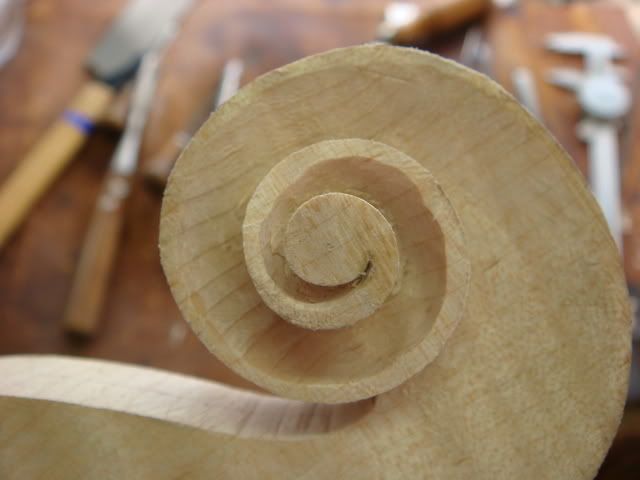
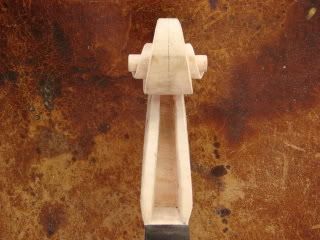
Now the front view. The scroll is tridimensional, so allways check it visually in different angles while you are working, front view and side view mainly. The lines most flow harmoniously without hills and valleys:
[IMG]http://s268.photobucket.com/albums/jj19/manfio/carvinga%20a%20scroll/[/IMG]
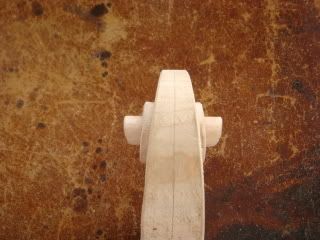
Back view:

Side view. Just advance to the next part when you have your work clean and cut to the line:
_________________
www.manfio.com
http://www.flickr.com/photos/7875988@N02/with/464604020/ |
|
| Back to top |
|
|
MANFIO
Super Member
Joined: 11 Apr 2007
Posts: 458
Location: Sao Paulo
|
| Posted: Wed Feb 20, 2008 6:37 pm Post subject: |
|
|
Thank you all!
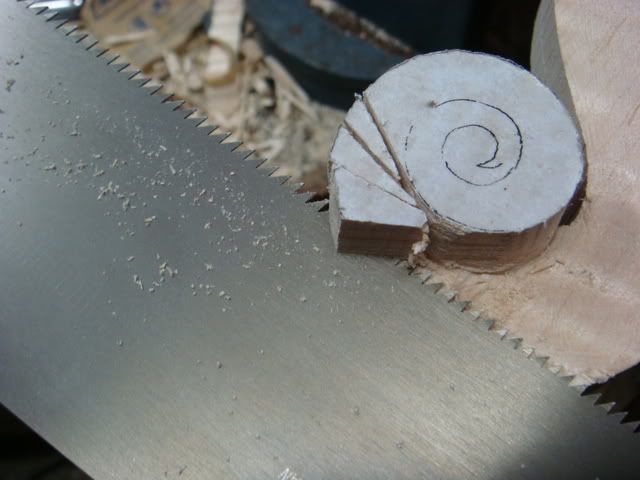
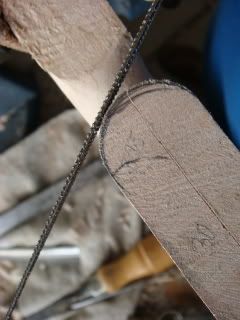
I continue sawing with my Japanese saw:
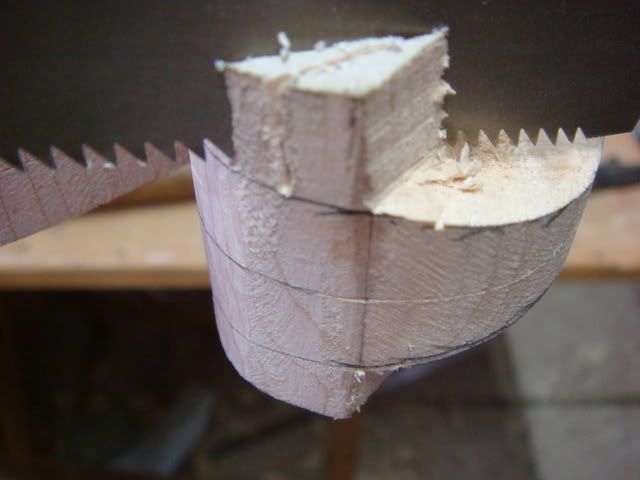
Notice the pin marks left by the dividers on centerline. These marks can be seen in many Cremonese instruments, including Stradivari, as pointed out by Sacconi in his "I Segreti di Stradivari":
I continue cutting:
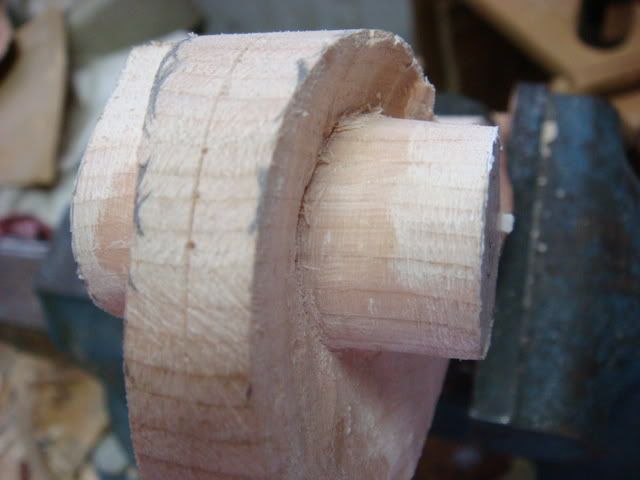
Back view:
Another view:
_________________
www.manfio.com
http://www.flickr.com/photos/7875988@N02/with/464604020/ |
|
| Back to top |
|
|
MANFIO
Super Member
Joined: 11 Apr 2007
Posts: 458
Location: Sao Paulo
|
| Posted: Wed Feb 20, 2008 8:55 pm Post subject: |
|
|
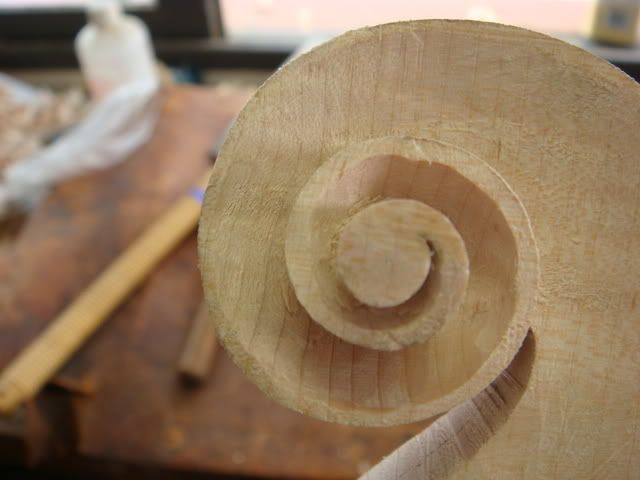
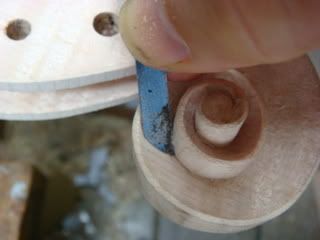
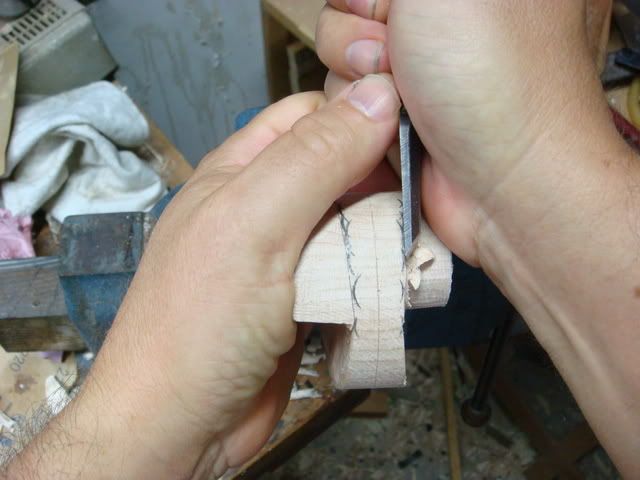
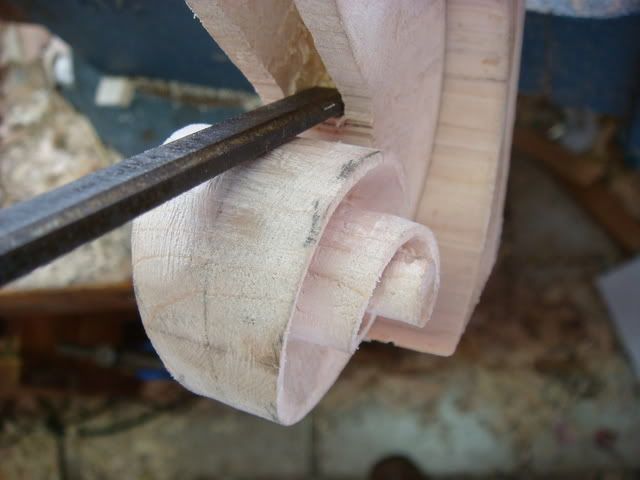
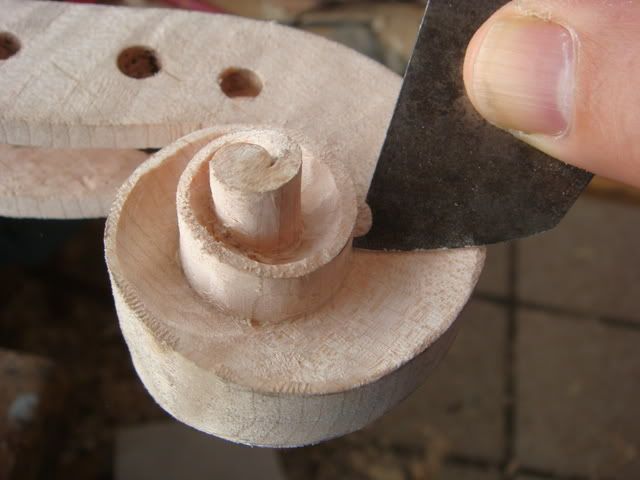
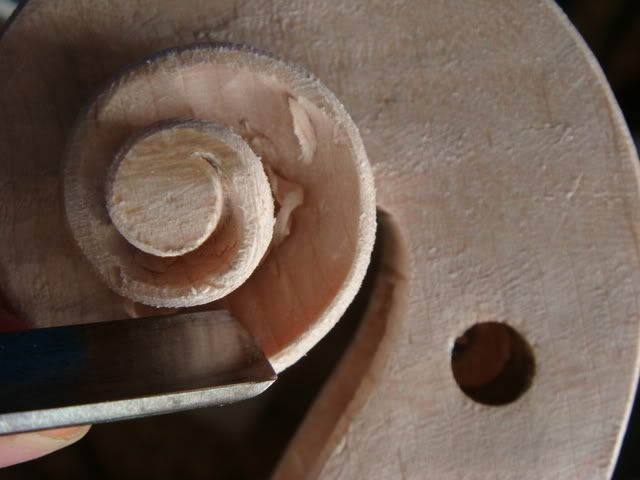
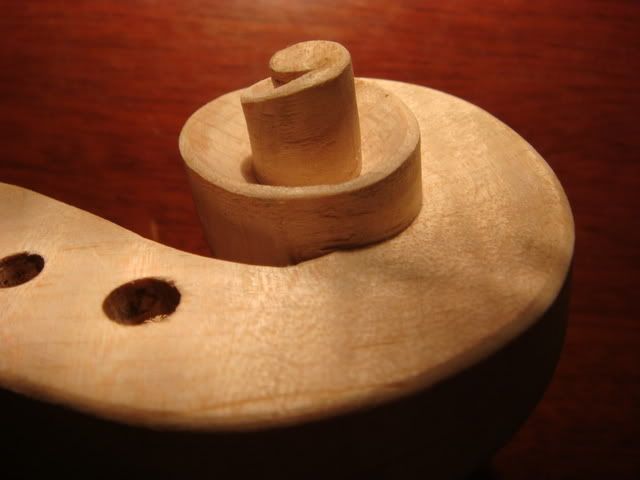
Undercutting the turns... notice that I'm leaving a flat area near the edge of the turns to be chamfered later. The gouge (a small gouge, Stubai, with a small mushroom handle) rotates around the turns, the sweep of the gouge must conform to the turns diameter. The gouge is rotated "down" the turns:

I draw a small circle with a divider for the last turn. The pin mark of the divider can be seen in many Italian scrolls. You can leave it or scrap it:

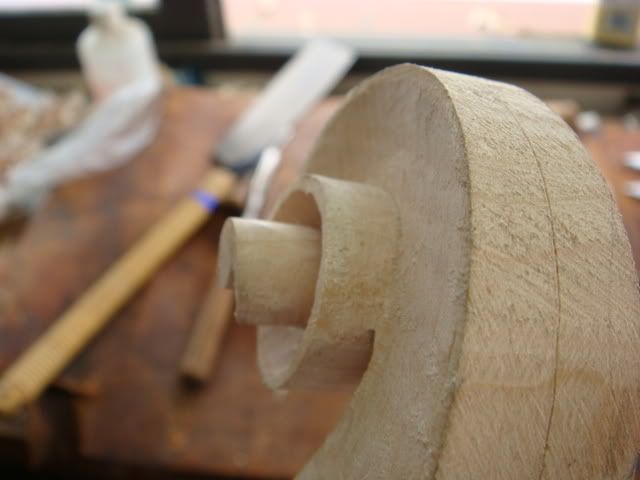
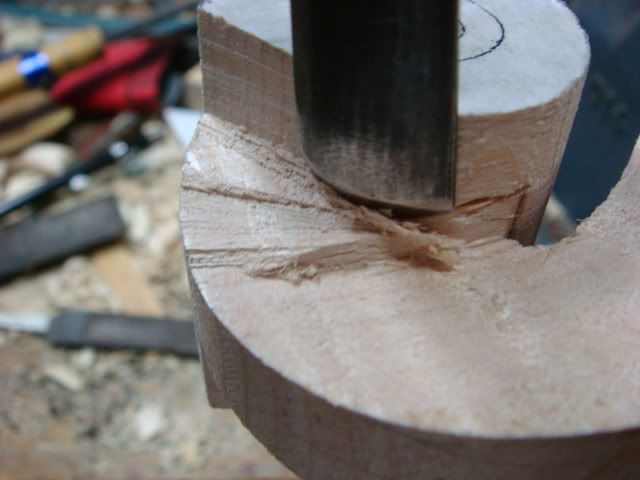
For the last turn, in the eye, it's impossible to work with the saw, So I work with a gouge that has exactly the same diameter of the eye. I rotate the gouge upright and then undercut:

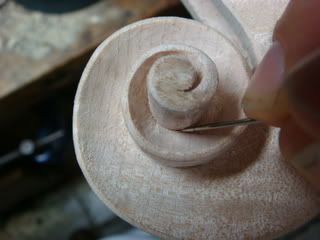
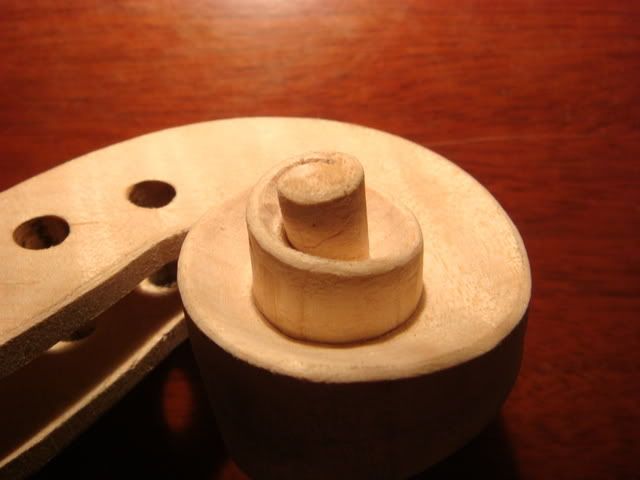
I use a small chisel here:

to get this:

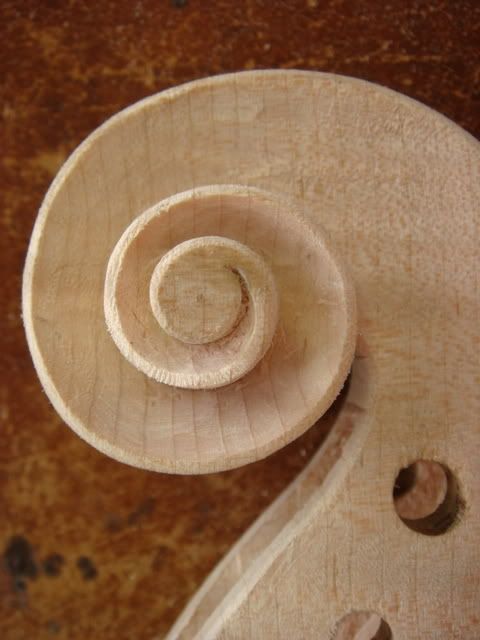
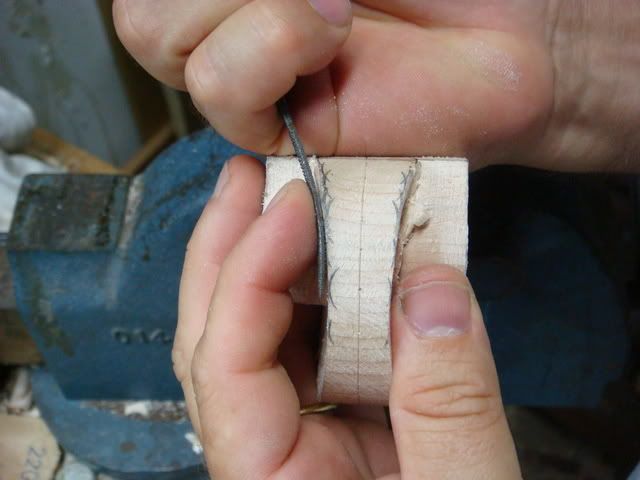
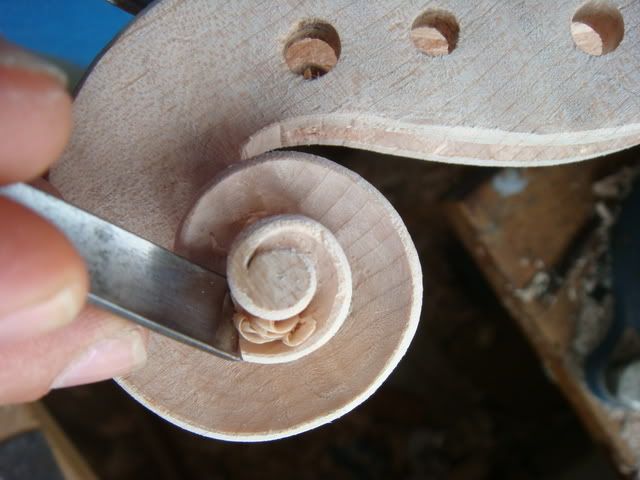
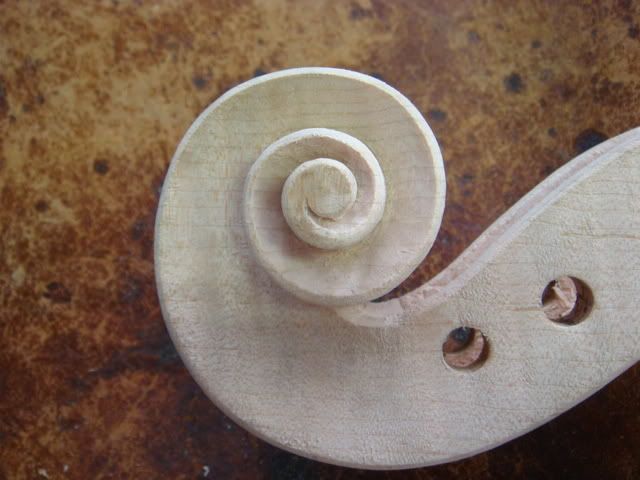
The last gouge stroke in the end of volute is quite important. The eye of the expert will be directed to this point instinctvely. I do that with two gouge strokes, the idea is making this, and making it deeper:


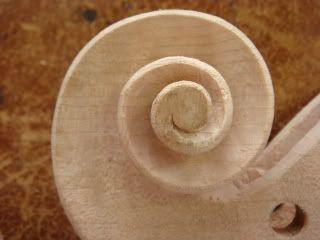
I will undercut a bit more:
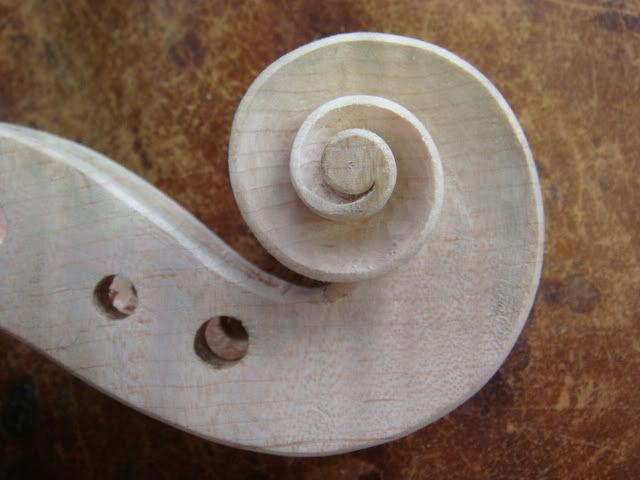
Here I have cleaned the surfaces with a small shaped scraper and now I'm reworking the throat, quite an important region in terms of style. Notice for instance how the throat on Del Gesù's (Catarina Guarneri, more probably) Leduc points down:

_________________
www.manfio.com
http://www.flickr.com/photos/7875988@N02/with/464604020/ |
|
| Back to top |
|
|
MANFIO
Super Member
Joined: 11 Apr 2007
Posts: 458
Location: Sao Paulo
|
|
| Back to top |
|
|
MANFIO
Super Member
Joined: 11 Apr 2007
Posts: 458
Location: Sao Paulo
|
| Posted: Sun Mar 02, 2008 6:33 pm Post subject: |
|
|
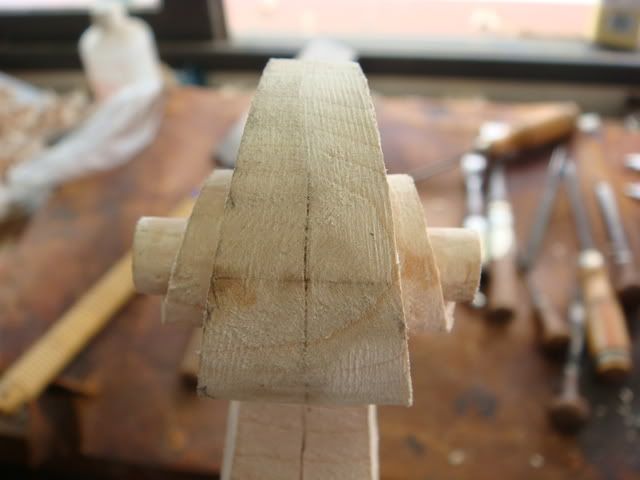
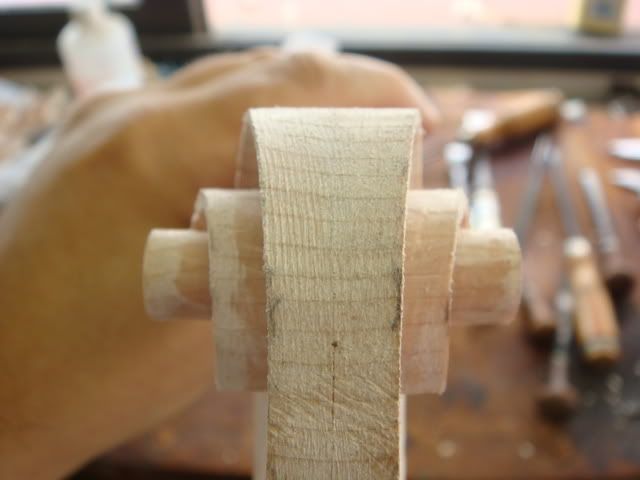
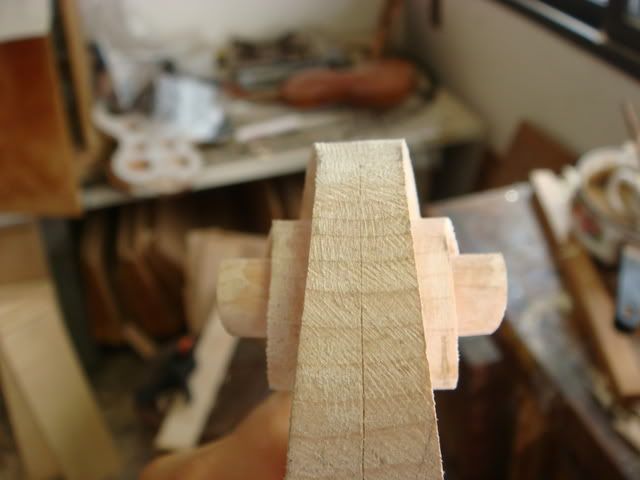
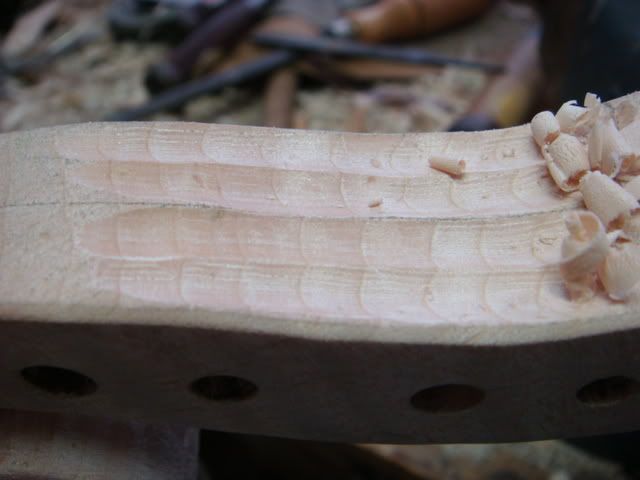
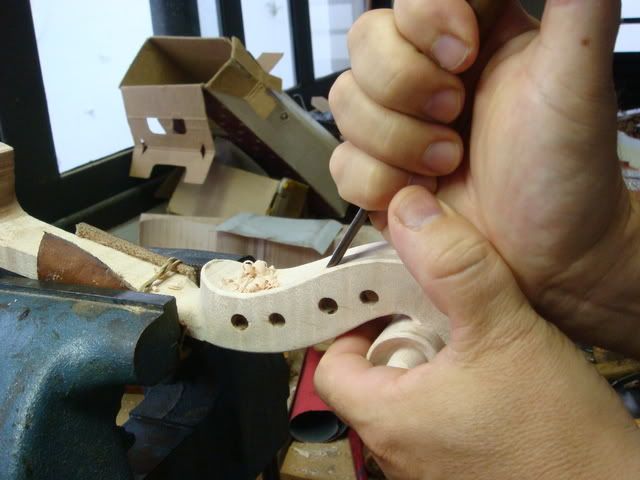
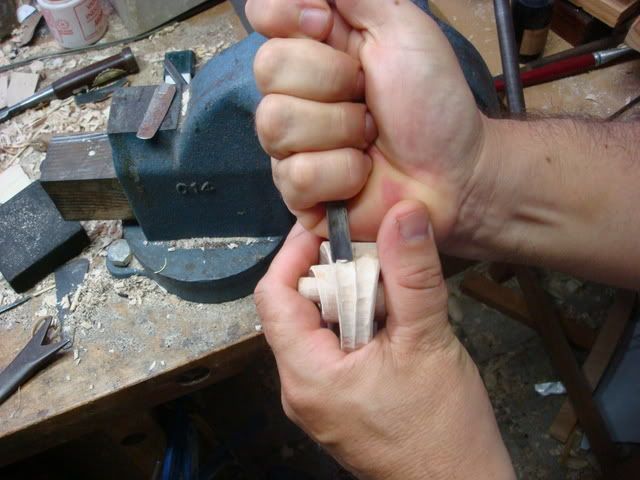
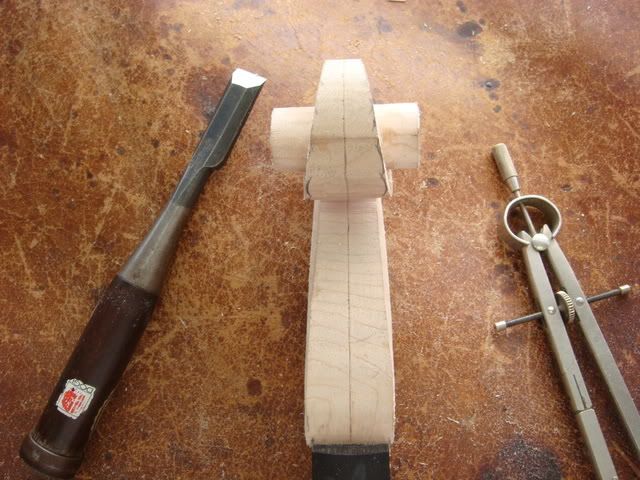
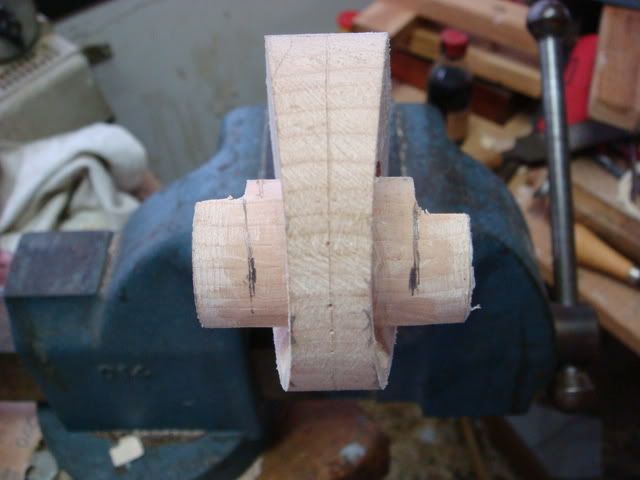
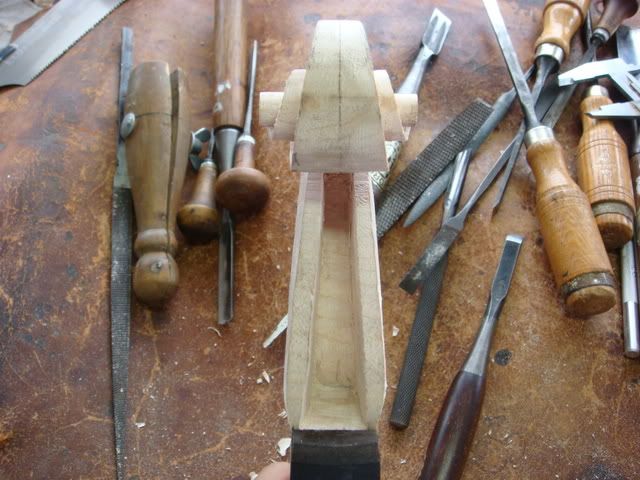
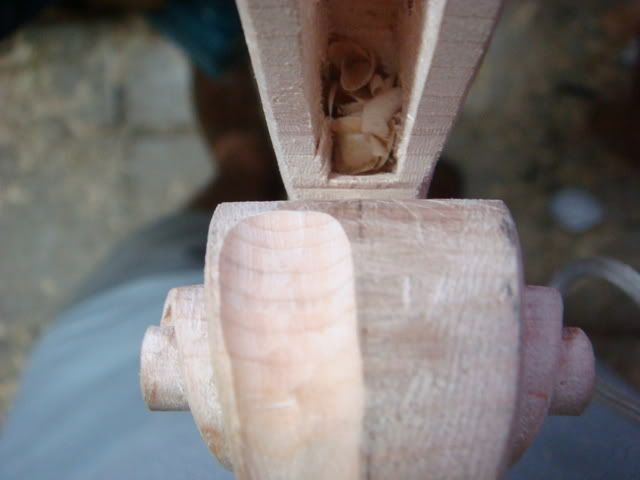
Now I drill holes to carve the pegbox:
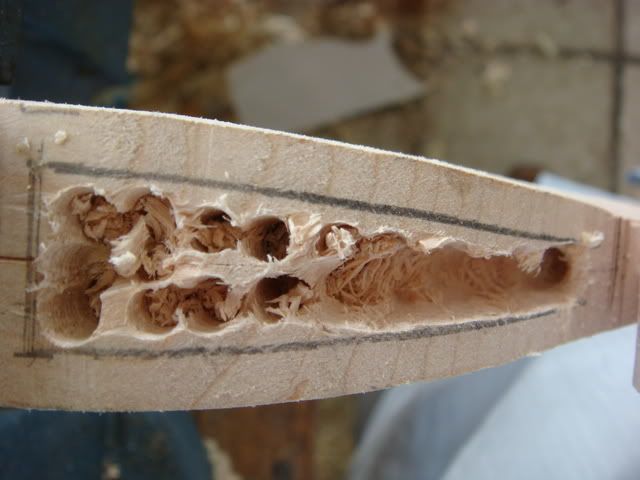
Notice the position of the chisel in this area, as well as the sawn neck block backing the scroll to suport it:
Here the upper nut is already glued:
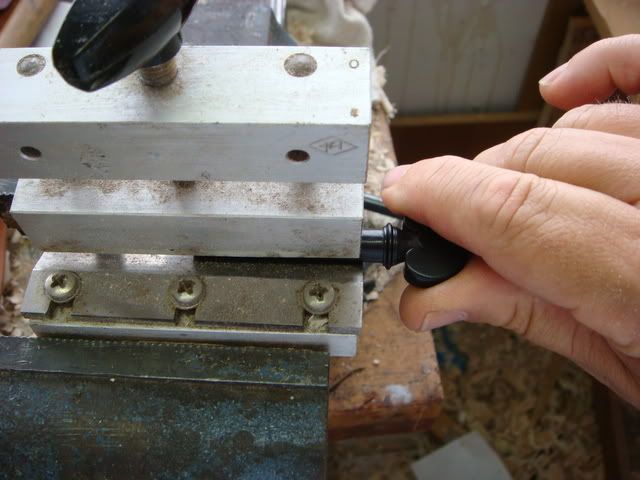
Shaping the pegs:
Oooops!!! I've forgotten to take some pics!!! And now the pegs are already in their place...
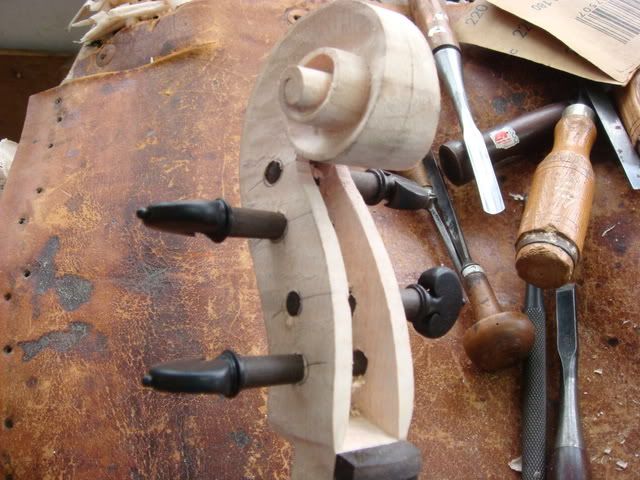
Cleaning the surfaces with a shaped scraper:
_________________
www.manfio.com
http://www.flickr.com/photos/7875988@N02/with/464604020/ |
|
| Back to top |
|
|
MANFIO
Super Member
Joined: 11 Apr 2007
Posts: 458
Location: Sao Paulo
|
| Posted: Mon Mar 03, 2008 11:12 am Post subject: |
|
|
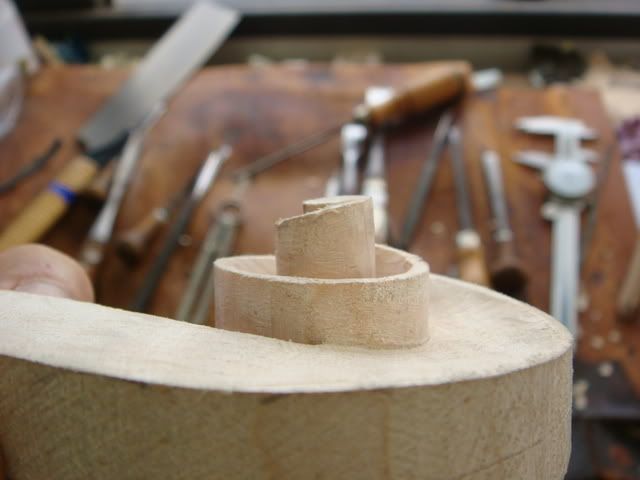
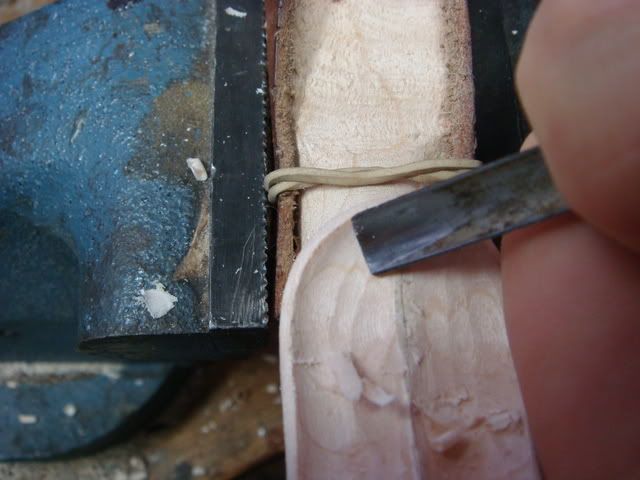
Now I will shape the chin of the pegbox, mine is in the form of a half circle:
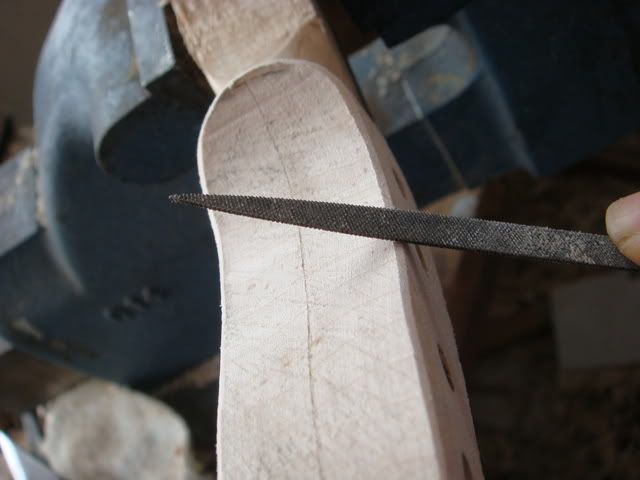
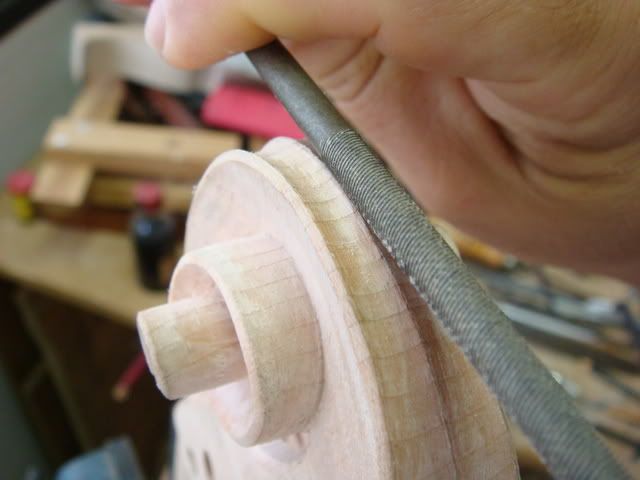
Now the chamfer, I'll do this with a small file and refinish with a scraper. Keep the file in the same position, the chamfer may not be rounded or finished with sandpaper:
The two lines of the chamfer may run parallel, that's quite quite important. Here now I'm working with a small gouge to undercut the turns and reach the inner line of the chamfer.
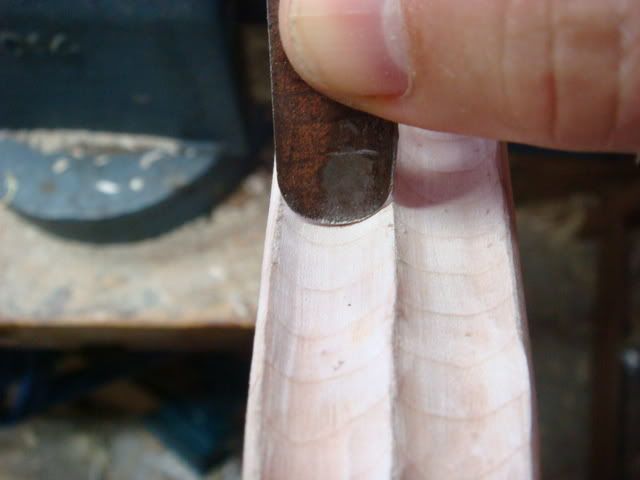
In Italian the chamfer is also called "nastrino", that is, little ribbon, and I like the idea of a little ribbon runing through the scroll. But the chamfer varies in width, depending on its place. It's a bit wider in the chin region and narrowner in the end of the turns, on the eye. Here I'm making a narrow chanfer in the eye region:
Here I'm undercutting again, preserving the inner line of the chamfer:
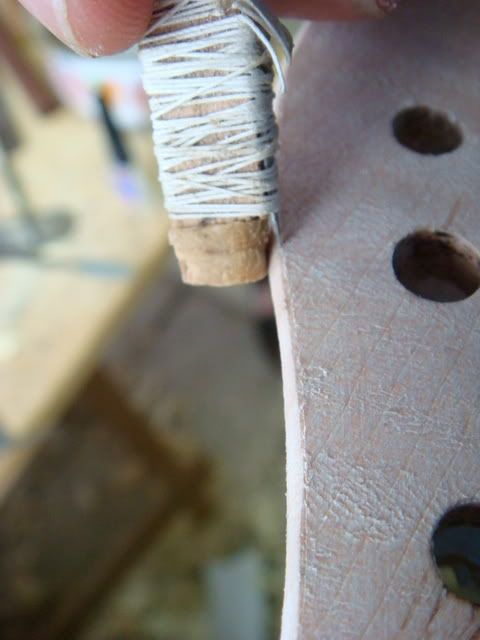
If you want, you may mark the lines of the chamfer with a simple marking tool like this. It's a scalpell knive glued in a piece of wood with sewing line and super glue. I'm not using this tool in this scroll, but I used it in the past:
_________________
www.manfio.com
http://www.flickr.com/photos/7875988@N02/with/464604020/ |
|
| Back to top |
|
|
MANFIO
Super Member
Joined: 11 Apr 2007
Posts: 458
Location: Sao Paulo
|
|
| Back to top |
|
|
MANFIO
Super Member
Joined: 11 Apr 2007
Posts: 458
Location: Sao Paulo
|
| Posted: Tue Mar 04, 2008 7:45 pm Post subject: |
|
|
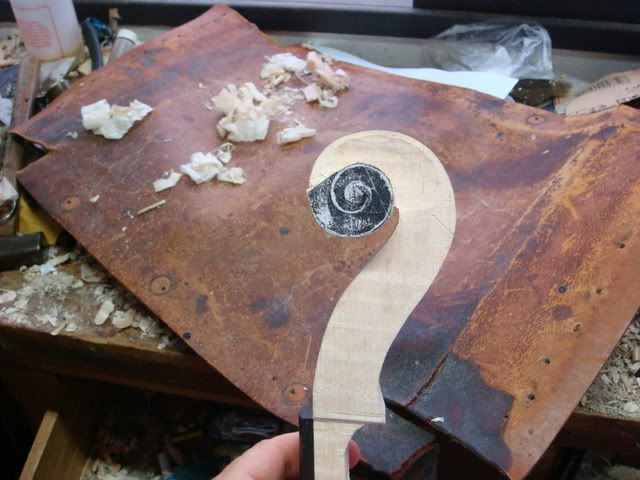
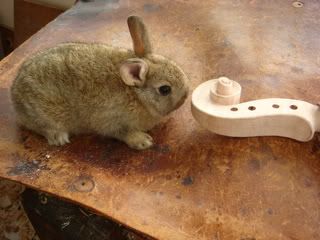
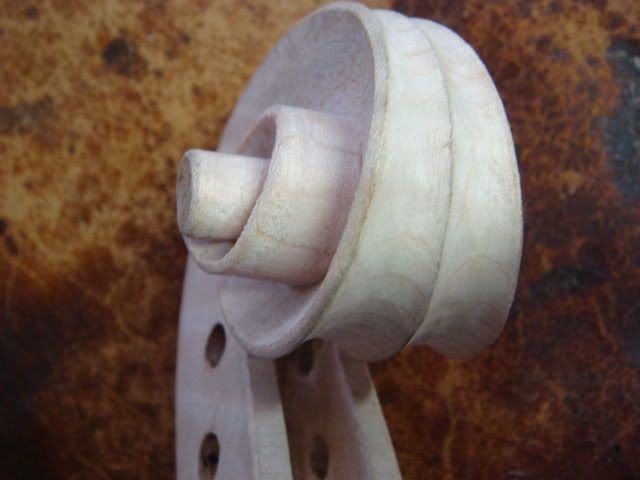
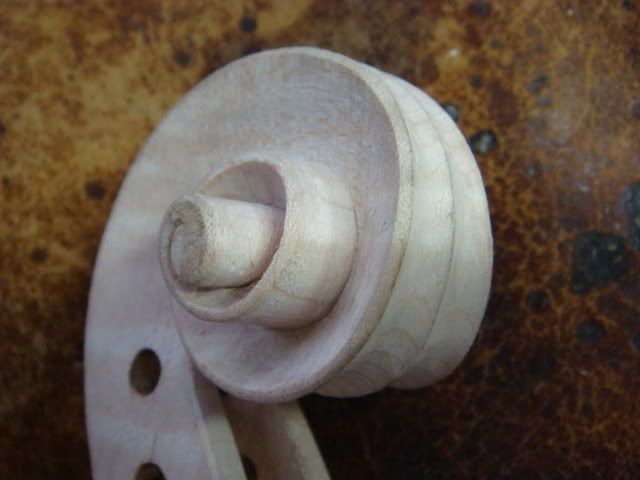
Coniglietto e riccio!
I think I'm almost satisfied now with the side view. Only when I'm satisfied with look of it I'll carve the channels on the front and back of the scroll.
I haven't mentioned it yet, but NO SANDPAPER was used, of course:
_________________
www.manfio.com
http://www.flickr.com/photos/7875988@N02/with/464604020/ |
|
| Back to top |
|
|
MANFIO
Super Member
Joined: 11 Apr 2007
Posts: 458
Location: Sao Paulo
|
| Posted: Wed Mar 05, 2008 6:58 pm Post subject: |
|
|
As I mentioned before, there are some scroll styles. Maestro Carlo Vettori, from Florence, published a quite interesting book called "Linee Classiche della Liuteria Italiana". If you happen to visit Florence go to visit him in his workshop on Via Guelfa, he is an expert in the Florentine School. He works with restoration and make many new instruments as well. I'll quote some parts of the above mentioned book regarding the scroll, and attach a pic of the book's page:
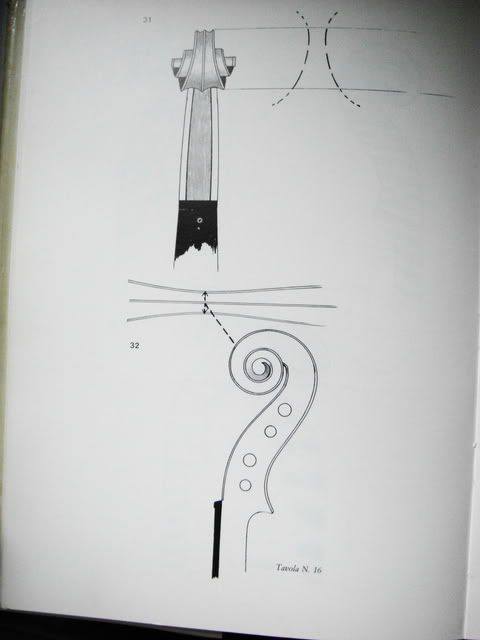
"Fig. 31 represents the front view of a scroll. This is the sort described as "aggressive" since the narrowest part of the chanelling (visible in fig 32) is moved forward by two centimetres from the centre. From this change of position comes the predominance of two curved lines (see the dotted lines in fig. 31). Many of the greatest Italian makers have employed this type of scroll not least among whom are certainly the members of the Amati family." (Carlo Vettori, "Linee Classiche della Liuteria Italiana", Giardini Editori e Stampatori in Pisa, 1980, pages 66, 67, 70 and 71).
_________________
www.manfio.com
http://www.flickr.com/photos/7875988@N02/with/464604020/ |
|
| Back to top |
|
|
MANFIO
Super Member
Joined: 11 Apr 2007
Posts: 458
Location: Sao Paulo
|
| Posted: Wed Mar 05, 2008 8:02 pm Post subject: |
|
|
I'll quote again the Maestro Carlo Vettori:
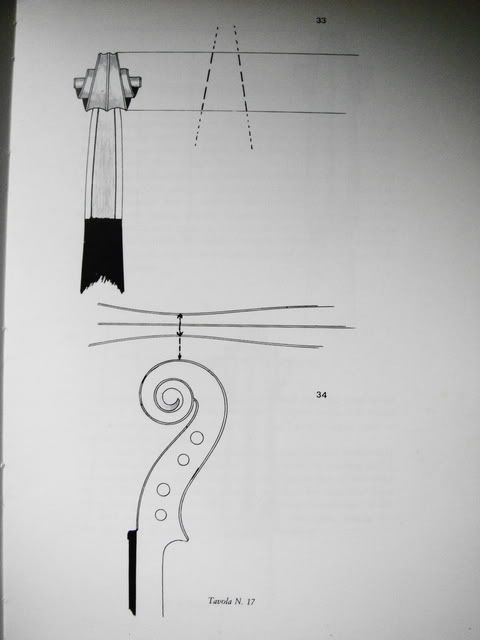
"Fig. 33 shows a front view of a scroll in which static and roughly pyramidal lines prdominate. The characteristic point of this design is that the narrowest part of the channeling is found in the centre of the scroll (fig. 34). This type of scroll is the one used by Antonio Stradivari and may be considered to be the purest andmost classic of all violin making" (Carlo Vettori, "Linee Classiche della Liuteria Italiana", Giardini Editori e Stampatori in Pisa, 1980, pages 66, 67, 70 and 71).
_________________
www.manfio.com
http://www.flickr.com/photos/7875988@N02/with/464604020/ |
|
| Back to top |
|
|
MANFIO
Super Member
Joined: 11 Apr 2007
Posts: 458
Location: Sao Paulo
|
|
| Back to top |
|
|
MANFIO
Super Member
Joined: 11 Apr 2007
Posts: 458
Location: Sao Paulo
|
| Posted: Thu Mar 06, 2008 3:46 pm Post subject: |
|
|
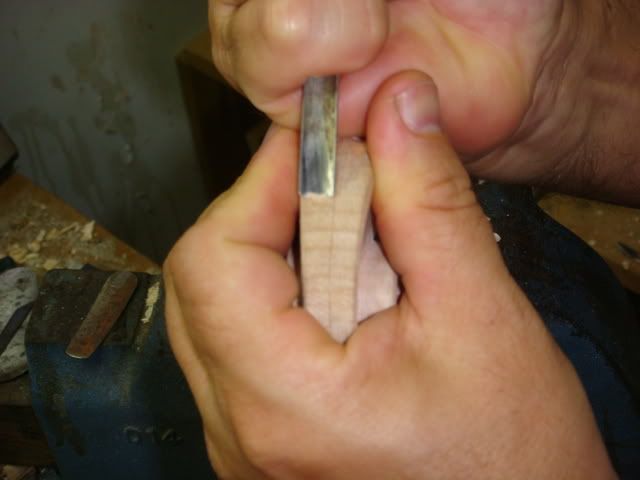
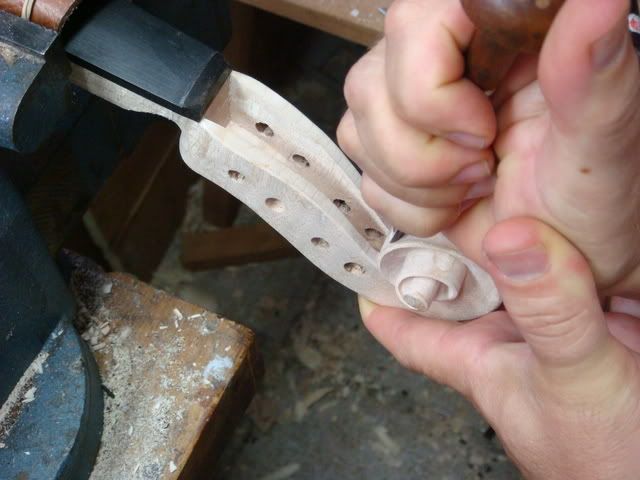
Notice the position of the hands. The scroll is a bit fragile in this point so you have to support it with your other hand while cutting the channel:
Here a view of the fluting of the front part of the scroll. I put a piece of sandpaper on the back to give contrast:

Here Im working in the fluting in the throat region with a knife:
_________________
www.manfio.com
http://www.flickr.com/photos/7875988@N02/with/464604020/ |
|
| Back to top |
|
|
MANFIO
Super Member
Joined: 11 Apr 2007
Posts: 458
Location: Sao Paulo
|
| Posted: Sat Mar 08, 2008 5:34 pm Post subject: |
|
|
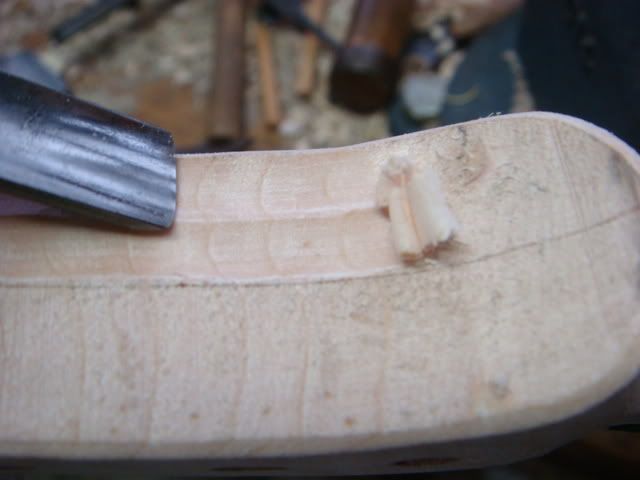
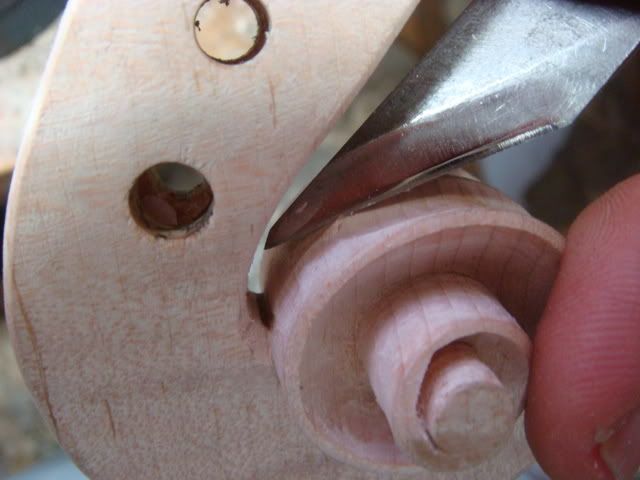
Here I'm using a knife for cutting till the centerline:

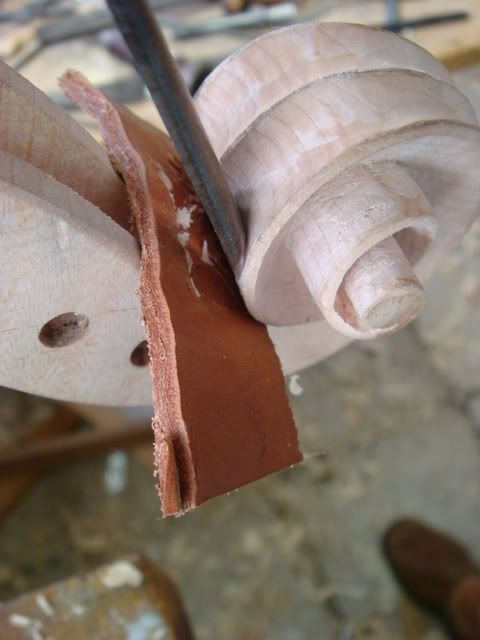
When cutting the fluthing near the throat, the gouge may scape and hurt the front part of the pegbox's walls, so I protect them with a small piece of thick leather:
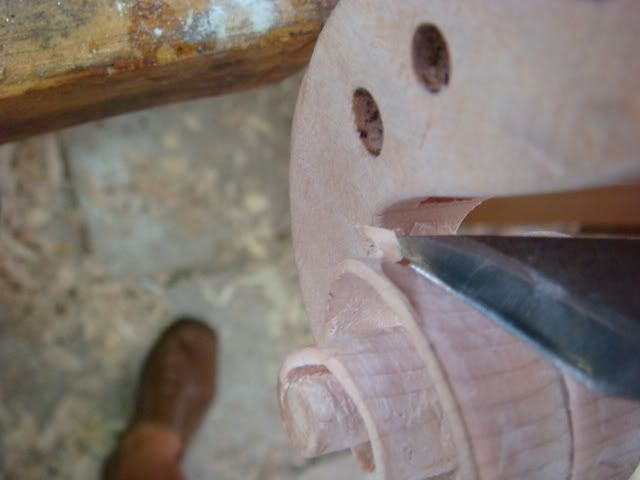
Again cutting the throat region with a knife:
Here using a knife to cut till the chamfer. The channell was made with the gouge, the knife will just cut the small remaining part till the line of the chamfer, I find it gives more precision than the gouge, the gouge can "invade" the chamfer, but many makers will use just the gouge:

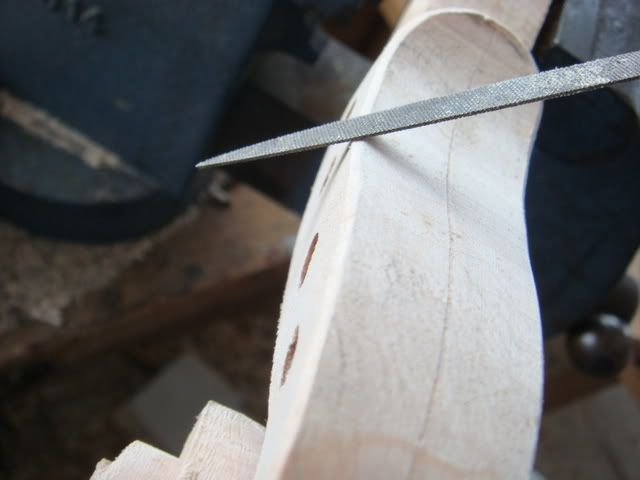
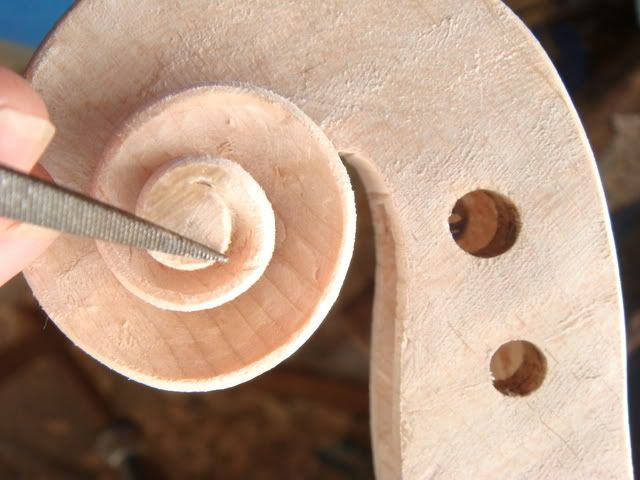
Here I'm using a rond file to take off some marks left by the gouge:

_________________
www.manfio.com
http://www.flickr.com/photos/7875988@N02/with/464604020/ |
|
| Back to top |
|
|
|